Arrow Stone Quilt Along Week 2
Welcome back for Week 2 of the Arrow Stone Quilt Along. This week, we’re going to cut all of the pieces for our quilt. Of course, I have some great tips for you when it comes to cutting fabric and keeping it organized.
If you’re seeing this for the first time, it’s not too late to join us! All of the past content for the Arrow Stone QAL can be found below:
First Tip: read the pattern first
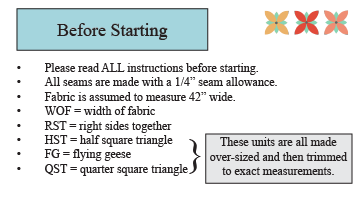
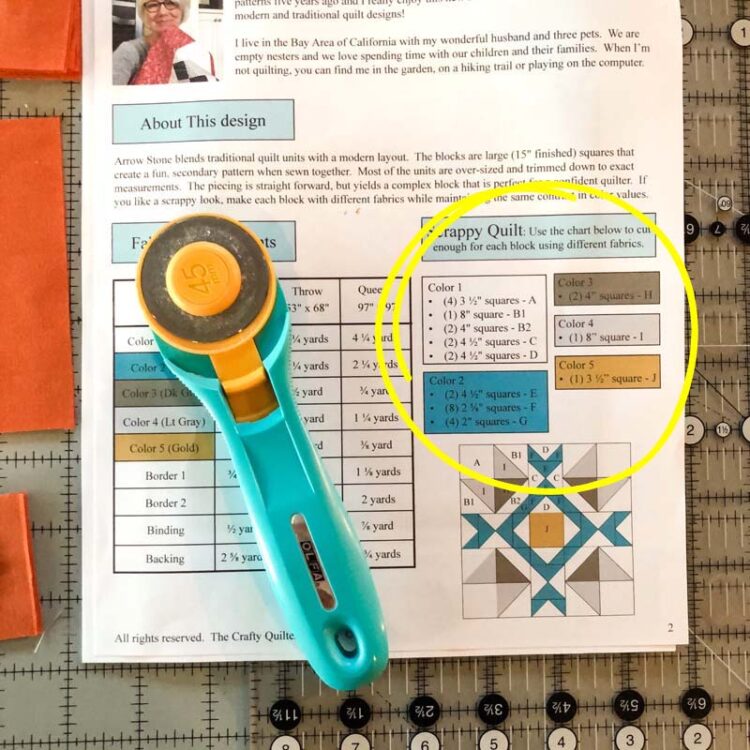
Before cutting any fabric, there’s one thing you should always do. READ THE PATTERN INSTRUCTIONS FIRST. Every pattern will tell you to do that, but who pays attention to those words? I do. Why? Because I want to know the techniques used in the pattern; I want to know if the units have been over-sized; and I want to know if there are any special rulers or tools I’ll need. Plus, there are basic quilting abbreviations that will be used throughout the pattern and possibly some other information that will come in handy. This is what you’ll see in the Arrow Stone pattern.
One of the main things I glean from reading the pattern first is whether or not I need to change any of the cutting instructions to suit my preferred piecing techniques. For example, I like to make units bigger and then trim them down perfectly whenever possible. I also prefer the 4-at-a-time method of making flying geese. So, if a pattern doesn’t include those things, I need to adjust the cutting dimensions to match my methods.
Organize your fabric
The next thing you should do is organize your fabric for the project. Your color palette is most likely different than the pattern’s colorway. What does Color 1 or Fabric A look like for you? If there’s space on the pattern, you can write in the fabric/color you’ll be using for each. If you’re making a scrappy version (like I am), you can still write in the color values or color family you’ll be using.
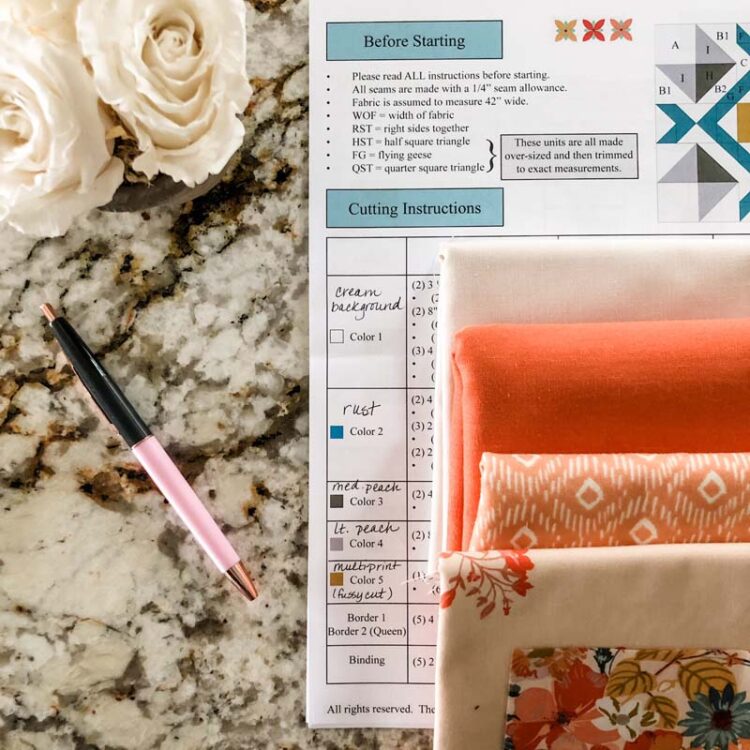
If you’re working on a pattern that doesn’t have space to write in your color choices, then take an index card and write down the title for each fabric used. In other words, if the pattern refers to a certain fabric as Color 1 or Fabric A or Background or a specific color, write that down. Cut a small rectangle from the fabric you’re using for that color and tape it next to the title. Now when the pattern refers to a specific fabric or color, you’ll know exactly what fabric to grab.
To help you stay on track and keep your fabric organized, I made an Arrow Stone QAL Check List & Fabric Swatch Organizer that you can download and print! As you progress throughout the quilt along, check off the box as you complete it. At the bottom, you’ll see a space for you to attach your own fabric swatches so you’ll know what fabric to use along the way.
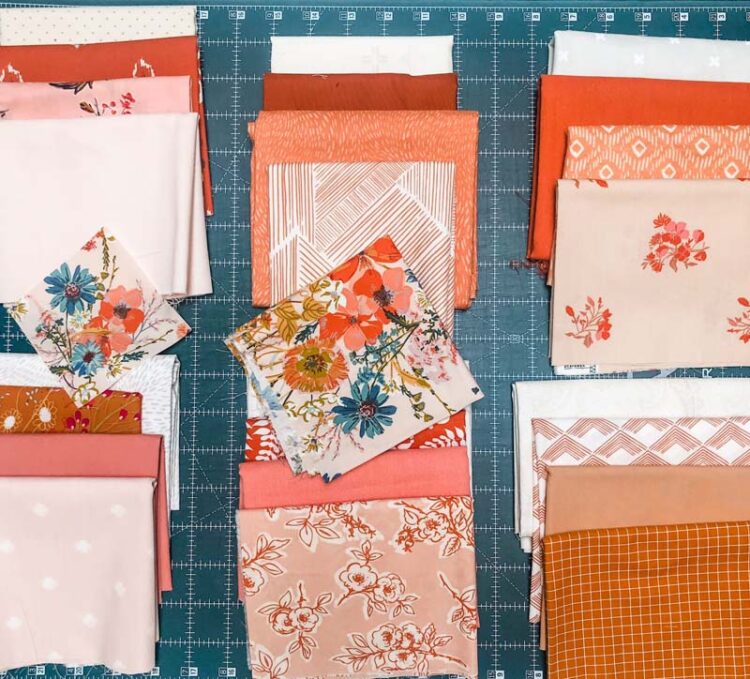
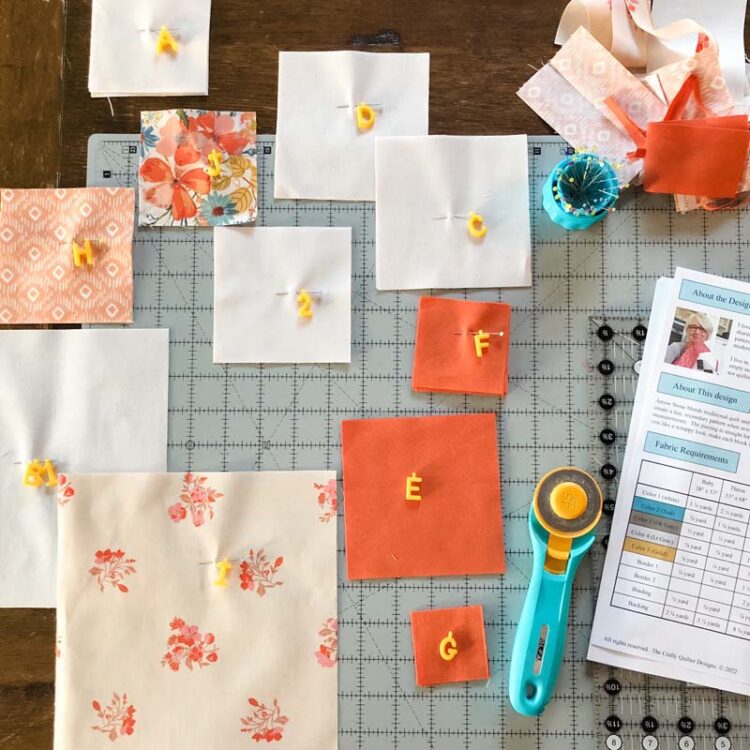
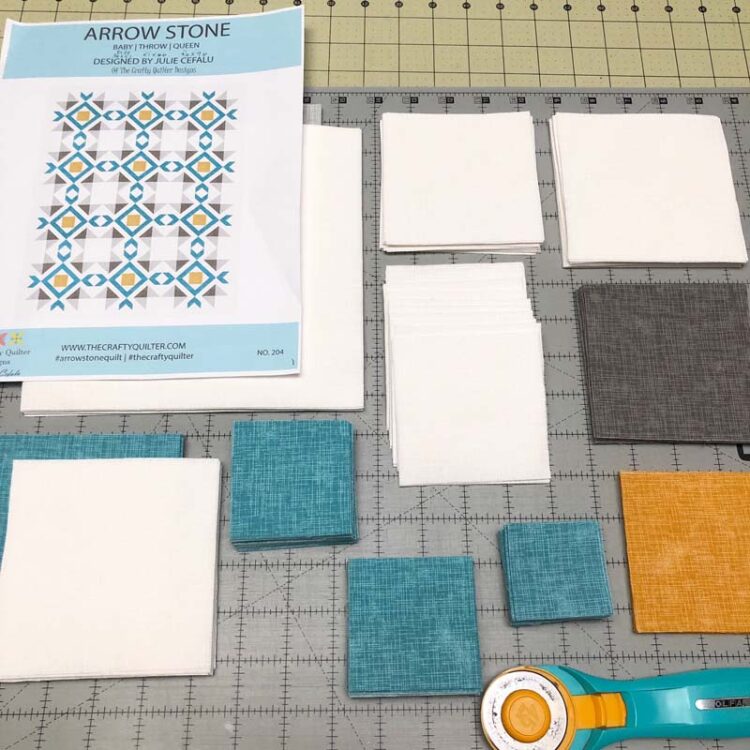
If you’re making a scrappy version of Arrow Stone (like I am), you can group your fabrics together for each block. Keep them stacked in the same order (color 1,2,3, etc). Color 5 is the same for all of my blocks so that’s not included in each stack – it’s the floral print in the middle of the photo below.
Cutting fabric
Now that your fabric is organized (and pressed from Week 1), we’re ready to cut! Here’s a few things to be mindful of when cutting fabric:
- Make sure you have a fresh blade in your rotary cutter. It makes a huge difference! Dull blades cause you to press down harder than you normally would which might make your ruler slide out of place.
- Try not to “see-saw” back and forth with your cutter. You’ll end up shredding the cut edge of your fabric.
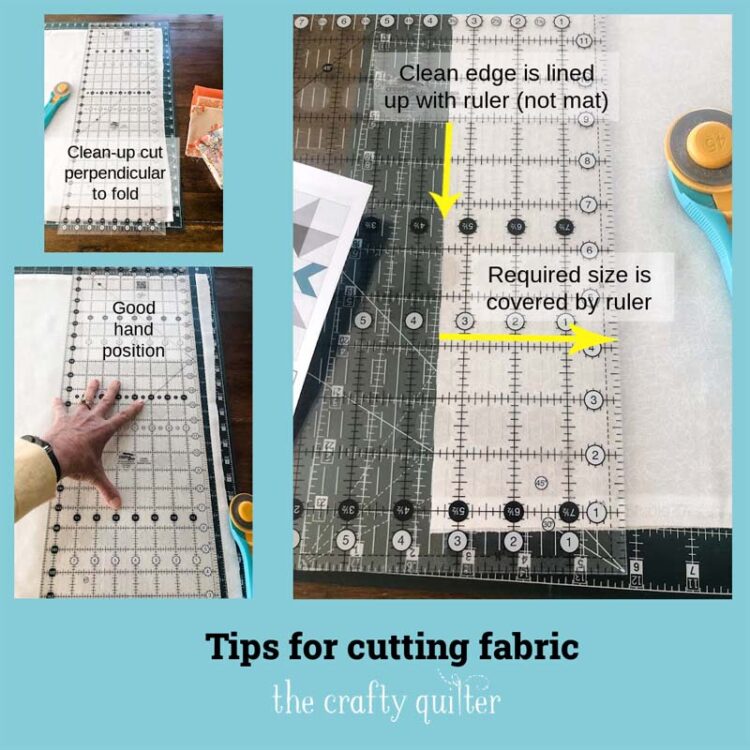
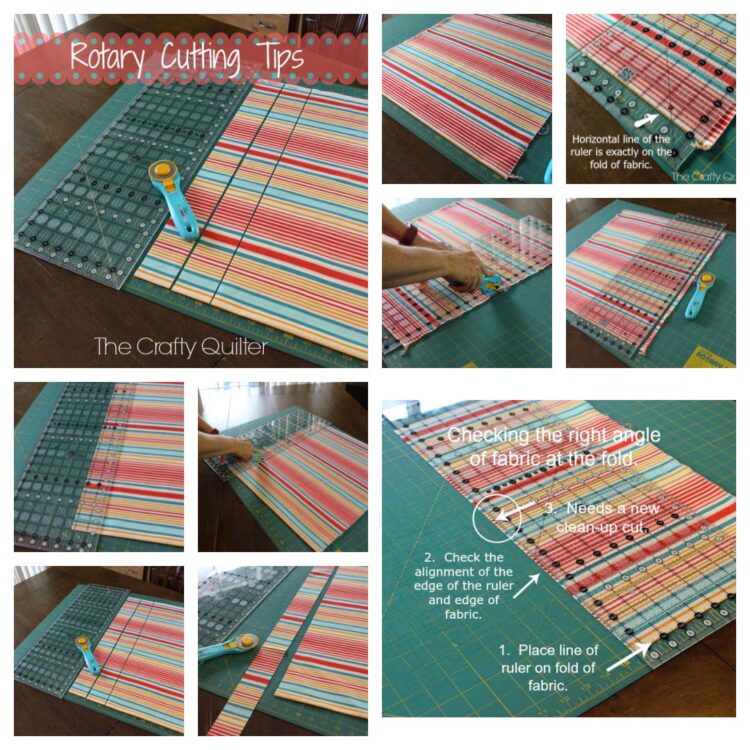
- Always try to cut your fabric on-grain. This is achieved by making your cuts perpendicular to the selvage (or sometimes parallel to the selvage for border strips). For yardage, fold your fabric in half, matching the selvage ends. Make sure there are no ripples or creases; it should lay flat or hang straight (if you’re holding it up in the air). For fat quarters or large scraps, I usually fold them in half, making sure the fold is parallel to the selvage.
- Hold your ruler securely. Your fingertips should be spread out and place your pinky off the edge of the ruler to prevent movement.
- Make your first cut (I call it the clean-up cut) so that it’s perpendicular to that fold.
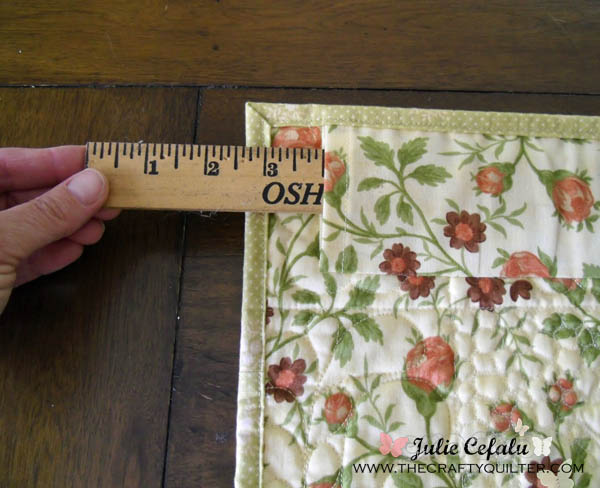
- Whenever possible, use your ruler to measure and cut instead of the cutting mat. Don’t place your fabric on the cutting mat and count the inches on the mat to determine where to place the ruler. Find the measurement required on the ruler and place that line directly on the cut edge of your fabric. Then make your cut. This is more accurate and much more time effective than lining everything up with the cutting mat.
- If you’re using yardage: after cutting several strips, double check that your cut edge is still perpendicular to the fold. Fabric is a fluid material and it may shift as you cut. Make a new clean-up cut if necessary.
- Once your strips are cut, you’ll be making sub-cuts. Follow the directions in the pattern and check off the cuts as you go along.
- Group or stack your sub-cuts, for example: all Color 1 (A) squares in one pile.
- If you’re making a scrappy version, follow the diagram/instructions on page 2.
If you want detailed rotary cutting tips, visit my earlier blog post, Rotary Cutting Tips. It includes lots of photos and a video all about rotary cutting that I did for The Quilt Show.
My favorite rulers
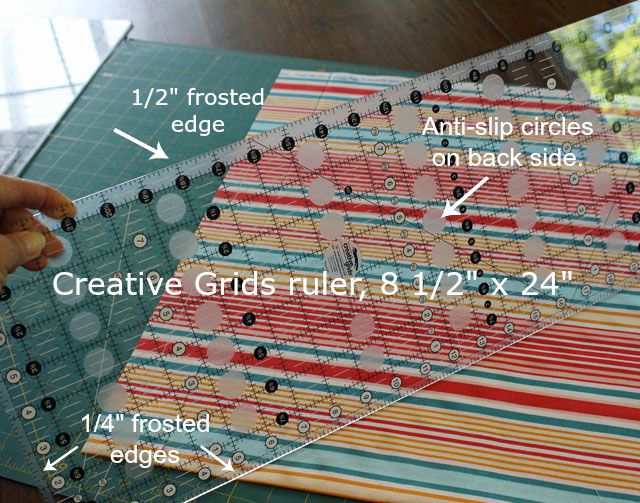
I love me a good ruler! I thought I would share what works well for me, but don’t feel like you have to go out and buy a new ruler. My favorite ruler for much of my rotary cutting is Creative Grids 8 1/2″ x 24 1/2″ ruler followed by the 8 1/2″ x 12 1/2″ ruler. These rulers have anti-slip circles on the back that grip the fabric and help prevent it from shifting. I also appreciate the frosted 1/4″ and 1/2″ edges on the ruler which are great for trimming up pieced units. You should definitely own a square ruler as well – the 6 1/2″ square is one of my most used. You can find Creative Grids rulers at most local quilt shops.
A recent addition to my ruler collection is the Creative Grids Stripology XL Ruler (affiliate link). This ruler is a game changer if you’re cutting lots of strips. It makes the process super fast and accurate! It has slots for your rotary cutter to fit into, and there are markings on the ruler for two of the most popular strip cuts: 2 1/2″ and 1 1/2″. It makes it easy to find the slot for your next cut. You can also cut 1/4″ increments and the instructions include a handy chart which makes that so easy.
The Stripology XL Ruler is designed large enough for cutting yardage, but can also be used with fat quarters or scraps. For yardage, you just need to fold the fabric so that you have four layers. After lining up the folded edges on the “0” line, you make your first cut and then choose the width for the next cut. This design makes the cutting process more accurate because you’re less likely to mis-cut and your strips are exact every time. Once you have your strips cut, you can easily layer the strips and then subcut them into rectangles or squares.
I used my Stripology Ruler when I was cutting my fabric for the cover quilt of Arrow Stone. I didn’t take any pictures at the time (unfortunately), but it sure did expediate that whole process! It’s shown below with fabric I used for a different project, so you can get an idea of how it’s used.

Project Organization
I don’t know about you, but I love tips on how to stay organized. With that being said, I’m not the most organized chick in the henhouse! But, I have learned from others and from experience along the way.
- Print out your pattern. To save paper, print it double-sided.
- Keep all fabric and the pattern in a designated container. I love clear plastic storage bins, but even a shoebox will do.
- Label your fabric and your cut pieces. I’m using Pinnable Quilt Block Markers from Purple Hobbies (one of our sponsors).
Week 2 Sponsor & Prize
We have an awesome prize this week thanks to our sponsor, Creative Grids! One winner will receive the Creative Grids Stripology XL Ruler! Woo Hoo!
Giveaway rules:
- Post a photo of your fabric cuts on Instagram using the hashtag #arrowstoneqal
- Deadline is Saturday, March 12, at midnight (PST).
- Your Instagram account must be public (otherwise I won’t be able to see it).
- Giveaway is open to US residents only due to shipping costs.
Week 1 Winners
- The winner of the $50 gift certificate to The Quilt Show’s online store is Janie Kemp @isabellaswhimsey.
- The winner of the annual membership to The Quilt Show is Sherry Desort @desortshe.
Thank you TQS for sponsoring our quilt along and congratulations to both winners! If you didn’t receive my direct message, please send me an email so I can get you your prize!

I hope you have a great week, and good luck cutting your fabric for the Arrow Stone Quilt Along. Take your time with it and show your progress on Instagram, #arrowstoneqal so we can see what you’re up to!

Discover more from The Crafty Quilter
Subscribe to get the latest posts sent to your email.


Compliments to you for the very efficient cutting of fabrics for this pattern! I’m making the throw size.
I’ve been working on the cutting of fabrics for Arrowstone QAL and it seems to be going well! I’m from Regina, Saskatchewan, Canada so may be the only alien in the group. I’m having fun!
Hi Julie,
I am very excited to make this quilt! I purchased the pattern but when I downloaded it, I did not find the particular pattern pieces,etc. Only general comments. Thank you. Christine
Julie, thanks for everything, your organization tips, are great.
Hi Julie! The tiny letters and numbers on the pins that you used to label your cut fabrics are a great idea. Can you share where we can get them? Thanks, Bette
Hi Bette,
I should have included that information in the blog post. Yes, those letters/numbers are great! You can purchase them at Purple Hobbies. If you’re signed up for the quilt along, Purple Hobbies has provided a discount code for participants – check the last two QAL emails.
Hi Julie, I’m still trying to decide what look I want. I don’t work with solids much but love this one. Your pattern is great, as are your tips. Thanks!
Hello Julie, Like you, I often create blocks using different methods listed on a pattern. Having to sew a millions of little pieces is not my idea of fun. So I use strip piecing often and other methods. But that often affects the yardage required for a pattern. For scrappy quilts, one can just pull out more scraps, but for a specific colorway, how much more fabric should one purchase ? 10 % or 20% or more? Thanks for your insight.
Hi Barbara Ann, that’s a great question! Most pattern designers include enough overage to absorb any small changes (or cutting errors) that people might make. However, you could always bump up the fabric required to the next 1/8 – 1/4 yard increment. I work in a quilt shop and I always tell people that it’s worth purchasing a little bit extra just to be safe. Especially for fabric lines that won’t be around long.
Good Morning. We have had an ice storm followed by a snowstorm in Northwest Wisconsin. That means “Snow Day” which quickly becomes “Sew Day.” I am excited to follow your detailed instructions and tips. I found this week it helped having my fabrics pressed and set out to look at during the week. It gave me a better insight on color placement. “Sew Day” is also a, “Let’s get this fabric cut day!” God Bless, Linda
Hi Julie – love all of the helpful rotary cutting tips. Unfortunately, the link to the The Quilt Show had an error. I hope that it will work again. Thanks, mary.l.
Hi Mary,
Thanks for letting me know. I’ve updated the link so it should work fine now.