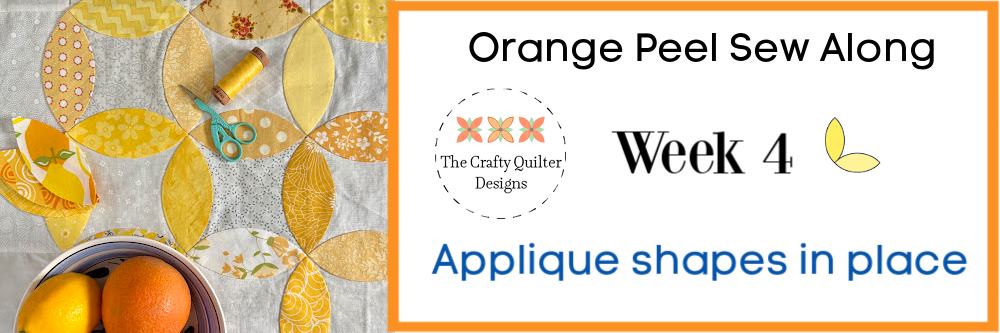
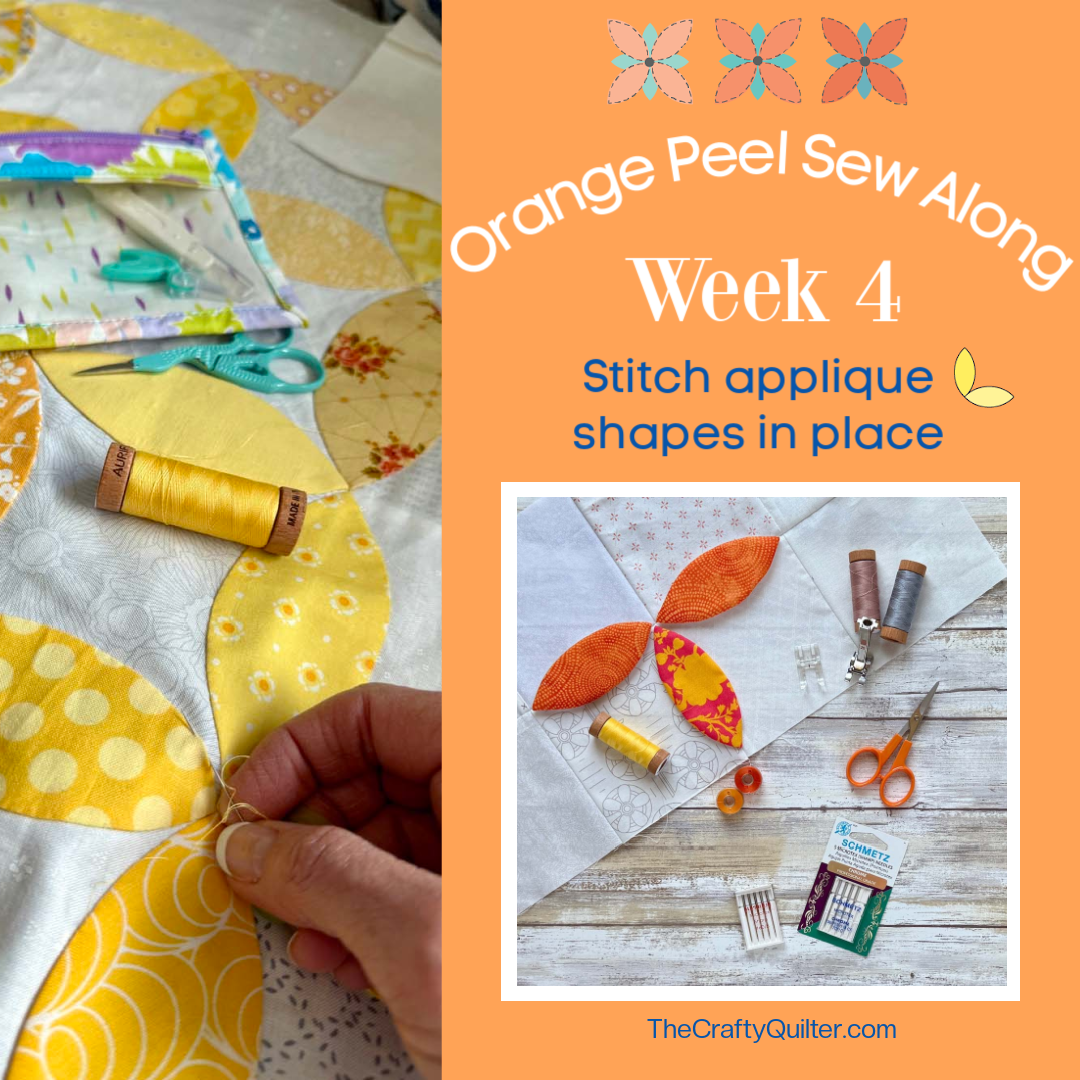
Orange Peel Sew Along Week 4
Welcome to Week 4 of the Orange Peel Sew Along! Now that we’ve made our orange peel shapes, it’s time to stitch them in place. You have the choice to sew the applique shapes by hand for a relaxed paced, or you can stitch them by machine for a fast finish. A BONUS option is to “quilt as you applique” which is a machine technique similar to “quilt as you go” that allows you to get two things done at the same time!
If you’re new to this sew along, I’d love to have you join me. It’s free! You can sign up (below) to receive the weekly emails. It’s the best way to receive the lessons, pdf’s and videos without the distraction of display ads. You can read more about the Orange Peel SAL here.
Hand applique
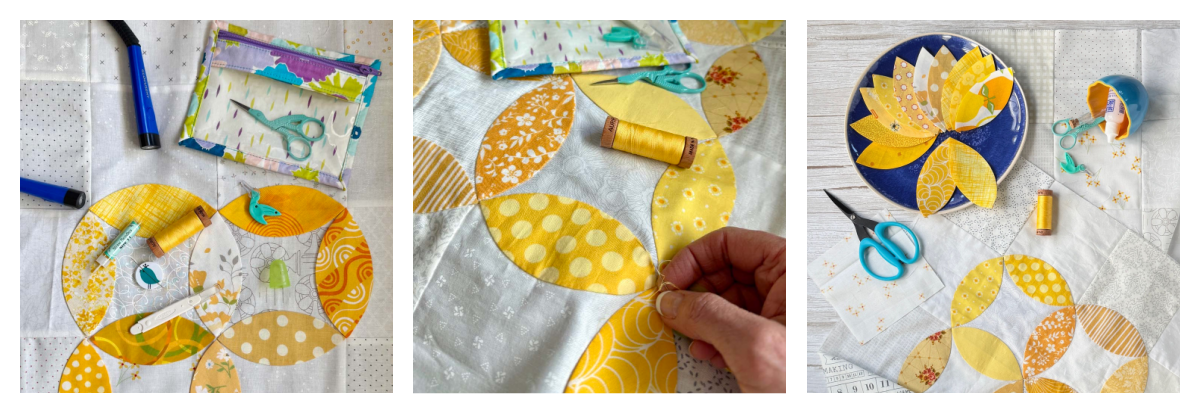
Hand applique is a great choice if you’re looking for something you can take with you or if you want a slow and mindful experience. Don’t be in a hurry, though, because this can be a long process! I like this technique especially when I’ve prepared my shapes with the freezer paper and starch method, but it works with the fused applique technique as well.
Supplies
- Thread to match orange peels. I recommend Aurifil 80 wt. cotton or a 60 wt. thread. Some people like silk thread which is 100 wt. (very fine). Feel free to use what you have.
- Sewing needle for hand applique. I recommend size 10 Straw needles by Foxglove Cottage or Tulip size 10 Big Eye Applique Needles
- Flexible rubber thimble (optional). This helps protect the finger that pushes the needle from the top. A Band-Aid works too!
- Needle threader (optional). I can’t live without one of these when threading needles with a small eye (which these needles have). Young eyes would be helpful, too! 😉
- Needle minder (optional). This is a small magnet that keeps your needles from getting lost.
Steps
The step photos show dark blue thread used to demonstrate the blind hem stitches. This is so it shows up well in the photos. Normally, I use a fine thread and color that matches the applique shape.
The video for this technique is more detailed than the written steps. It’s a little longer than the previous videos, but worth the time if you’re new to hand applique. There’s also a separate, short video on how to make a quilter’s knot!
- Baste the applique shapes in place, if you haven’t already. See Week 3 for specific instructions.
- Thread the needle with ~18″ of thread and make a small knot at one end. See the video on how to make a quilter’s knot.
- Starting from the back, bring the needle up into the seam allowance, close to the folded edge.
- Place the needle into the background fabric adjacent to where it came out (close to the applique shape) and take a small stitch, about 1/8″ – 1/4″ away. Angle the needle so that it comes up into the folded edge of the applique shape.

- When you reach the point of the orange peel, you may need to use the needle to gently tuck any folds under before proceeding.
- Continue taking small stitches until your thread tail is about 6″ long.
- Bring the needle to the back and tie a knot (single or double).
- Take a small stitch into the background only (don’t catch the applique fabric) and cut the thread.
- Repeat until all the applique shapes have been stitched down.


Hand applique video
Quilter’s knot video
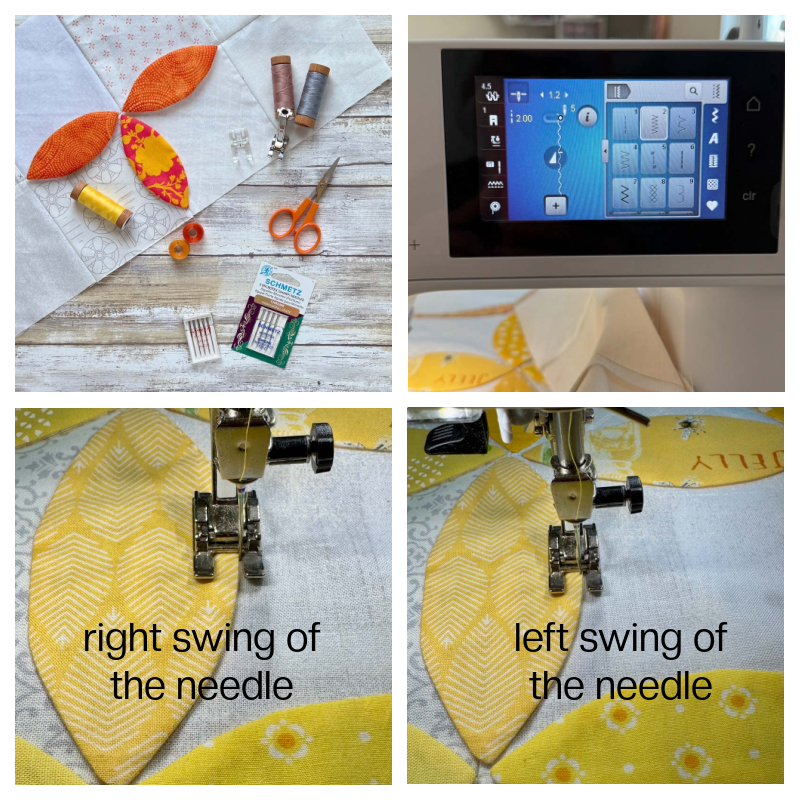
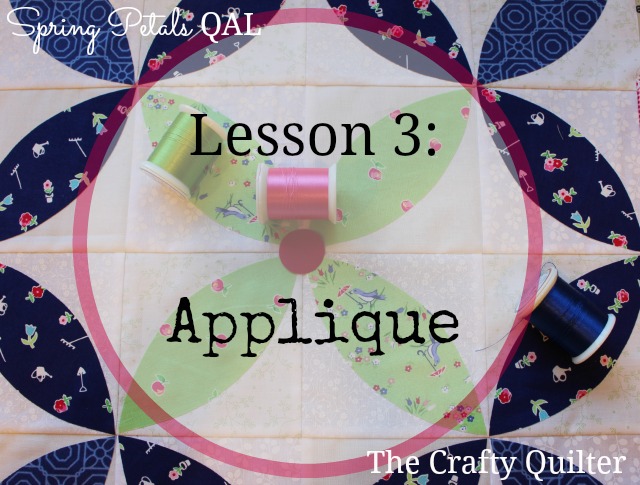
Machine applique

There are many looks you can achieve with machine applique such as bold and flashy or blending to the point of invisibility. Since we have a turned edge, I’ll be focusing on invisible machine applique for the written steps. Just know, that it’s really up to you and how you want your quilt to look.
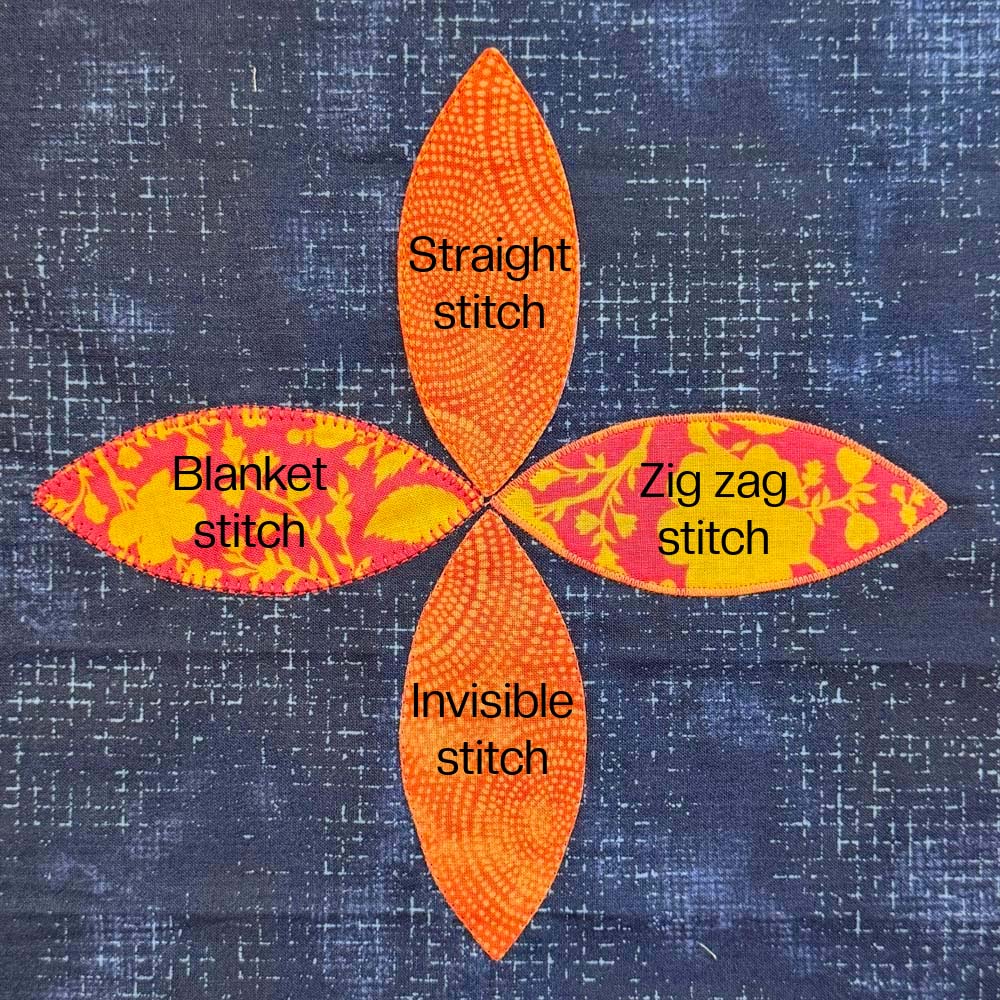
In the video, I’ve included four different machine stitches so you can see the different look each produces. The stitches are invisible, zig zag, straight and blanket stitch.
Supplies
- Sewing machine that can do a zig zag stitch
- Thread that coordinates with color of orange peels. Cotton 50 wt. thread or finer thread (60-80 wt.) for the top.
- Optional: Clear invisible thread such as MonoPoly by Superior Threads (instead of cotton thread.)
- Neutral color thread or a coordinating color for the bobbin. Cotton 50 wt. or 60 wt.
- Microtex Sharp needle, size 70/10 for fine thread. This will leave a small hole. You may be able to use a size 60/8 as well. Just be careful NOT to use an automatic needle threader. If you’re using 50 wt. thread or thicker, find the needle size that works best.
- Open toe applique foot for your sewing machine is helpful but not necessary.
Steps
If you want to achieve an invisible or hand applique look to your project with your sewing machine, these steps will guide you. You may want to practice on a small sample first. This gives you a chance to test your machine settings and thread tension.
- Set up your sewing machine with your chosen thread(s), needle and foot.
- Select the zig zag stitch and adjust the settings to 2.0 stitch length and 1.2 stitch width. Your machine may not adjust to those settings. Ideally, you want the zig zag to be very narrow and the stitches that fall on the inside of the shape to be ~1/8″ – 1/4″ apart.
- Use the needle-down feature of your sewing machine if you have one. This assures that when you stop sewing, the needle stops in the down position so you don’t lose your place.
- You’ll be working in a clockwise direction.
- Start close to any tip of an orange peel shape. You can lock your stitches using an automatic locking stitch (if your machine has one) or backstitch or overlap the start and end stitches.
- Stitch as close to the edge of the shape as possible. The right swing of the needle will land in the background fabric right next to the shape. The left swing of the needle will land inside the shape, very close to the folded edge.
- Continue stitching until you get to a point. Stop and pivot, then continue around the other side.
- You can continuously sew the shapes in place by going on to the orange peel right next to the one you just finished. I often take a few anchoring stitches at the end of one, lift the presser foot, bring the needle up and then place it where I want to start stitching. There will be a little bit of “travel thread” that I can clip later. (No photos for this step.)
Machine applique video
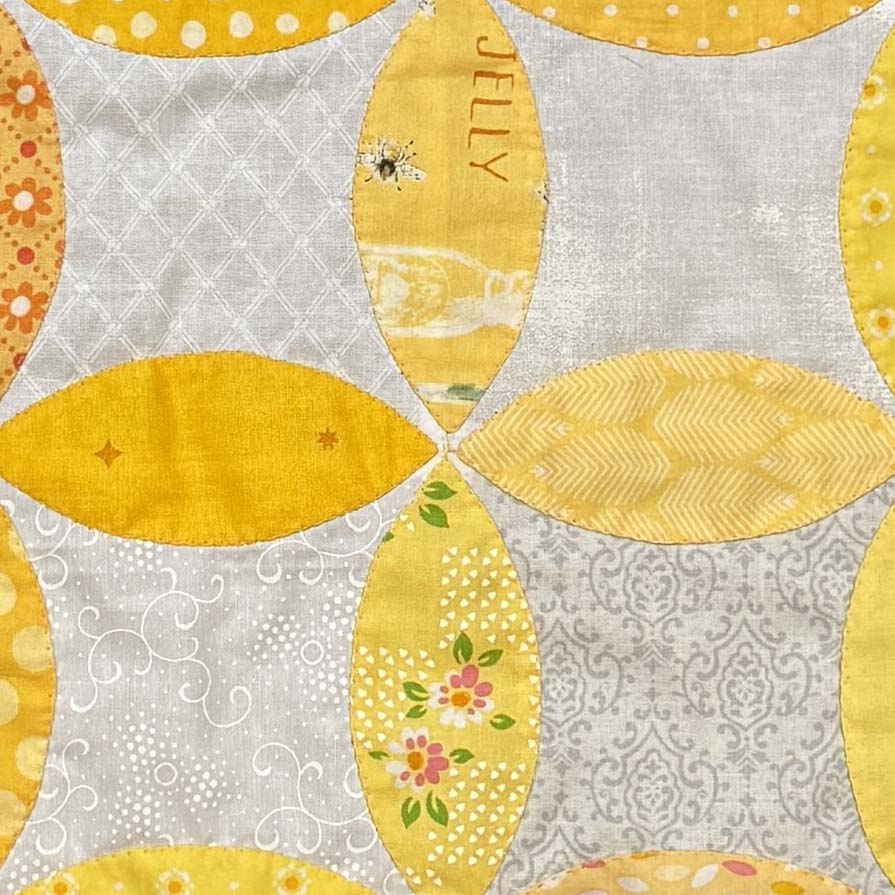
If you want to use other machine stitches, you can! You can see in the photo below examples of four common stitches. The blanket stitch and zig zag stitch are more decorative. These are all demonstrated in the machine applique video.
Quilt as you applique
This method is similar to “quilt as you go” in that you will do the applique stitching at the same time as you do the quilting. You can use the same machine stitch as above and make the stitches more hidden, or you can use a straight stitch inside the folded edge of the orange peel. I chose a more decorative approach and used thick thread (Aurifil 12 wt.) along with a straight stitch. It worked out quite well!
Supplies
- Thread that coordinates with color of orange peels. Choose cotton 50 wt. thread or finer thread (60-80 wt.) if you want the stitching to blend or hide. Choose a heavier thread such as 40 wt. or 30 wt. if you want the stitches to be more decorative.
- Neutral color thread or a coordinating color for the bobbin. Cotton 50 wt. or 60 wt.
- Microtex sharp needle in the appropriate size for your chosen thread.
- Walking foot
- Batting and backing
Steps
- Make sure the orange peel shapes are basted well in place.
- Baste the quilt layers together (top, batting and backing) with your favorite method.
- Set up your machine with your chosen thread, needle and a walking foot.
- Use the needle-down feature of your sewing machine if you have one. This assures that when you stop sewing, the needle stops in the down position so you don’t lose your place.
- Start close to any tip of an orange peel shape. Bring up the bobbin thread and lock your stitches or leave long thread tails (and bury later).
- Begin stitching in a clockwise direction using your chosen stitch.
- When you return to the starting place, you can move to the next closest shape and continue stitching. I often take a few anchoring stitches at the end of one, lift the presser foot, bring the needle up and then place it where I want to start stitching. There will be a little bit of “travel thread” that I can clip later.
- Once everything is stitched in place, you can continue quilting the remainder of the quilt.
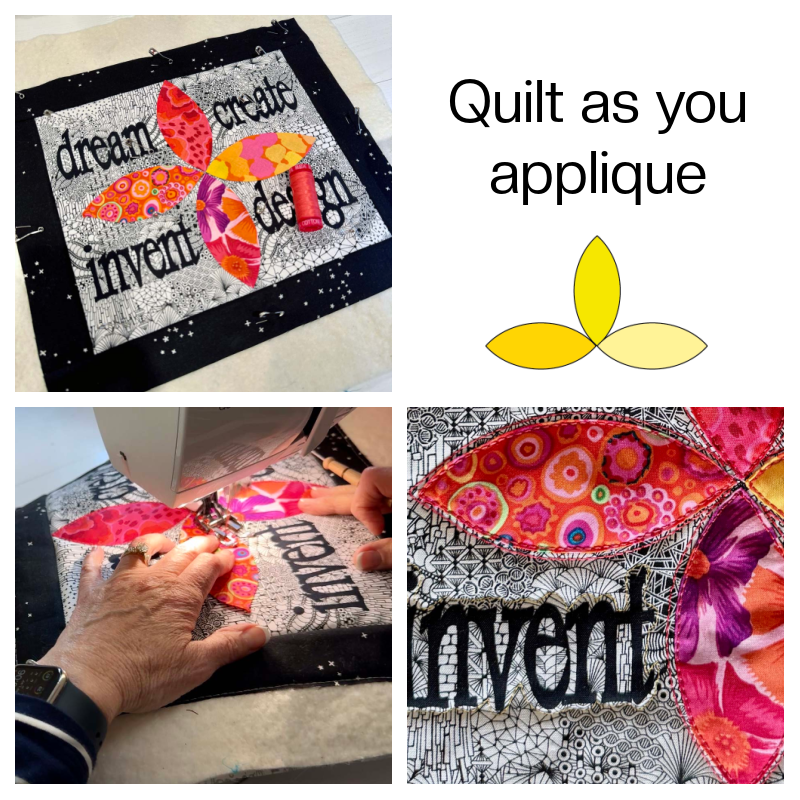

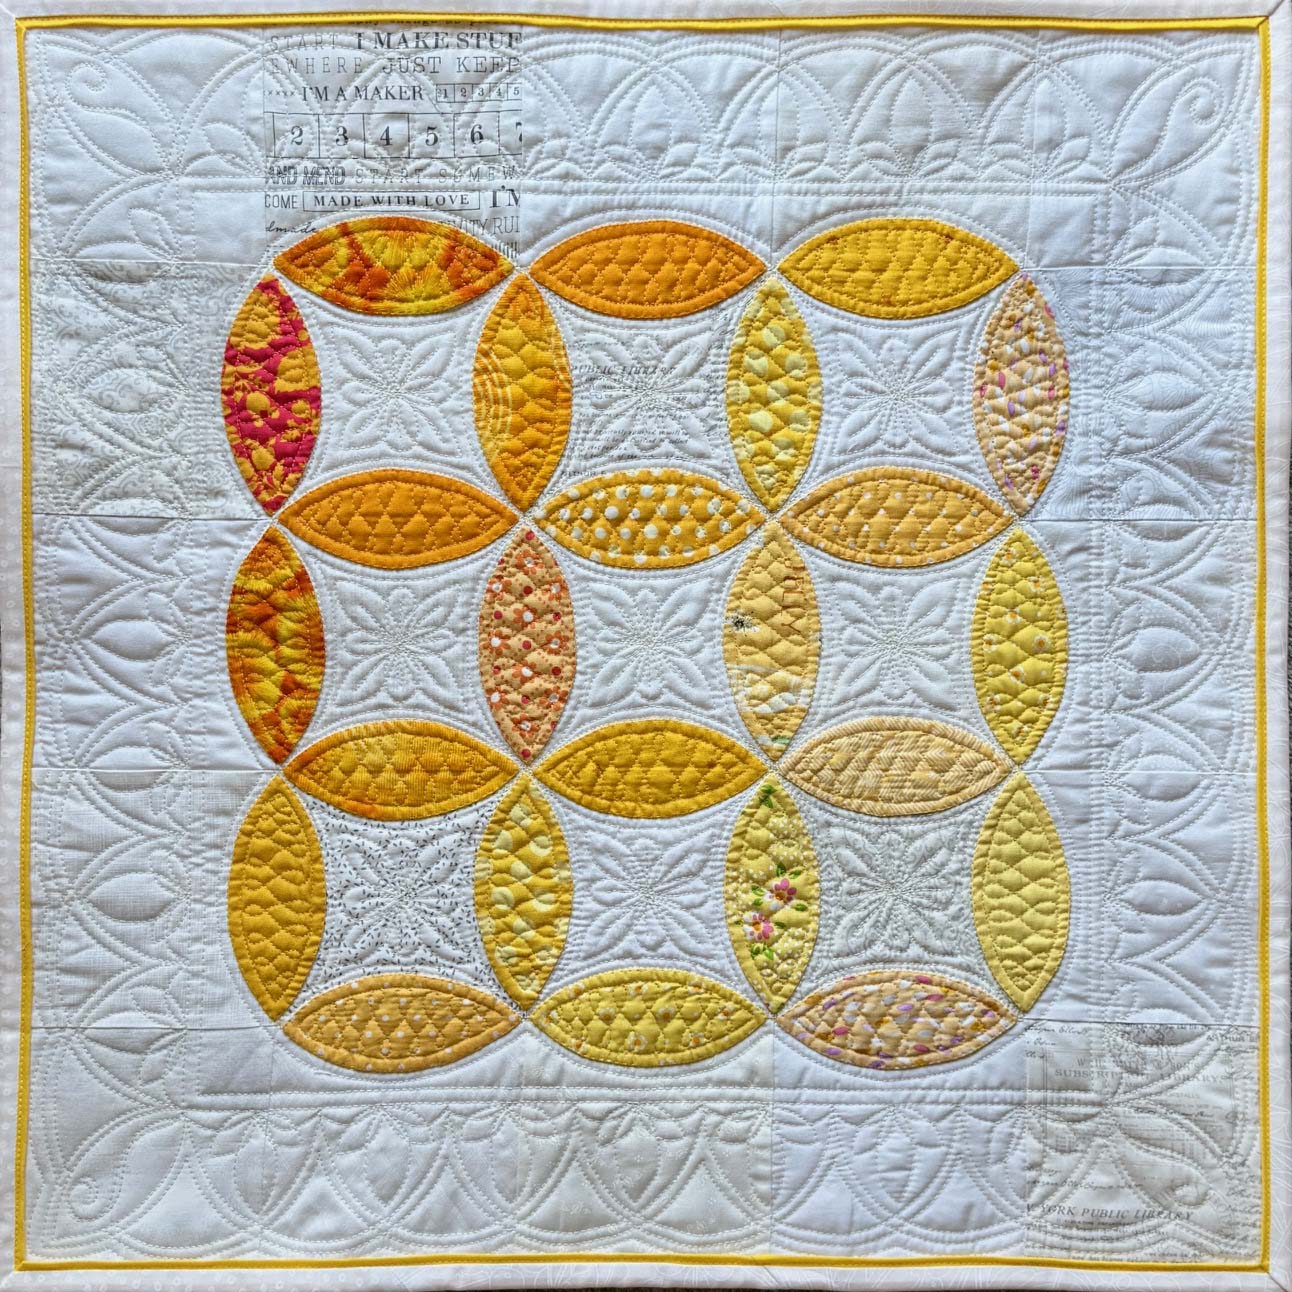
The sample above was made using the freezer paper & starch method to prepare the applique shapes. I used fabric by Kaffe Fassett for the orange peels. The background fabric is an old piece from my stash. It had the words printed on it, and I fussy cut them. Unfortunately, I don’t know who the manufacturer is.
Quilt as you applique video
FAQ’s
Q: Are the orange peel shapes cut on the straight of grain or the bias? A: Either way is fine. Since the curve is so gentle, it doesn’t make a big difference.
Q: Can I use an acrylic template to make my orange peels? A: It depends. First, it needs to be the right size. Second, it should NOT include the 1/4″ seam allowance. With the applique methods we’re using, you would just be tracing around the acrylic template. The only acrylic template I know of that fits the criteria is the KT Melon Template by Kansas Troubles Quilters.
Q: Can I place my orange peel shapes diagonally in the center of each square? A: Yes, you are certainly welcome to do that. You should check the size or your applique shapes; you’ll most likely need to increase the size to fit the diagonal.
Q: If I plan on machine stitching the orange peels, can I used double-side fusible web? A: Yes, you can use a fusible web product such as Heat ‘n Bond Lite; however, that’s a different technique used with fusible raw edge applique. Follower the manufacturer’s instructions.
Q: When using leaders & ender (or chain stitching) how do you *lock* your stitches so the seams don’t fall apart (backstitch)? A: It’s very prohibitive to backstitch at the beginning or end of a seam when you’re chain piecing. Since most seams are bisected by another seam, that’s enough to lock them in place. It’s also helpful to use a shorter stitch length such as 2.0.
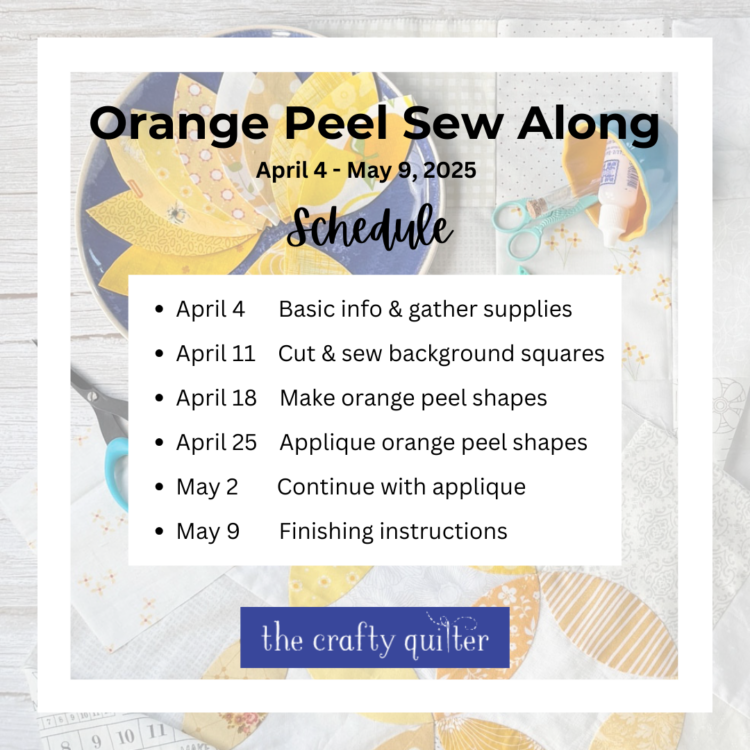
Sew Along Schedule
Orange peel pattern
The orange peel pattern is a pdf that you can download and print. It includes basic instructions along with the template page. Please note this is a free pattern and has not been tech edited.
This week’s assignment
- Stitch the orange peel shapes to the background.
Previous week’s lessons
Sharing
If you use Instagram, remember to take pictures of your progress and post them. It’s a great way to see what others are doing!
Make sure to use the hashtag #orangepeelsewalong and tag me @thecraftyquilter. Remember that only public accounts are visible to everyone (even with the hashtag).
I hope you’re enjoying the sew along. It’s time to start sewing – by hand or machine! Which will you choose?

Discover more from The Crafty Quilter
Subscribe to get the latest posts sent to your email.
DISCLAIMER:
Some of the links on this site are affiliate links and I may be compensated a small commission when you make a purchase by clicking on those links. I only promote products and services that I use and love myself. Your support enables me to maintain the content of this blog and I am truly grateful!