My videos and more on quilt binding
Quilt binding was the most confusing part of the quilt making process when I first started quilting. Fast forward 25 years, and I’ve learned numerous ways to tackle this step. I even made four videos for The Quilt Show all about quilt binding. These videos have been removed from their website, but I’m sharing links to them here!
Not only do I have videos, I have five quilt binding tutorials with different techniques and tips that are really useful. Every quilt has different binding needs such as quilts with odd angles, quick finishes and tiny quilts (such as mug rugs).
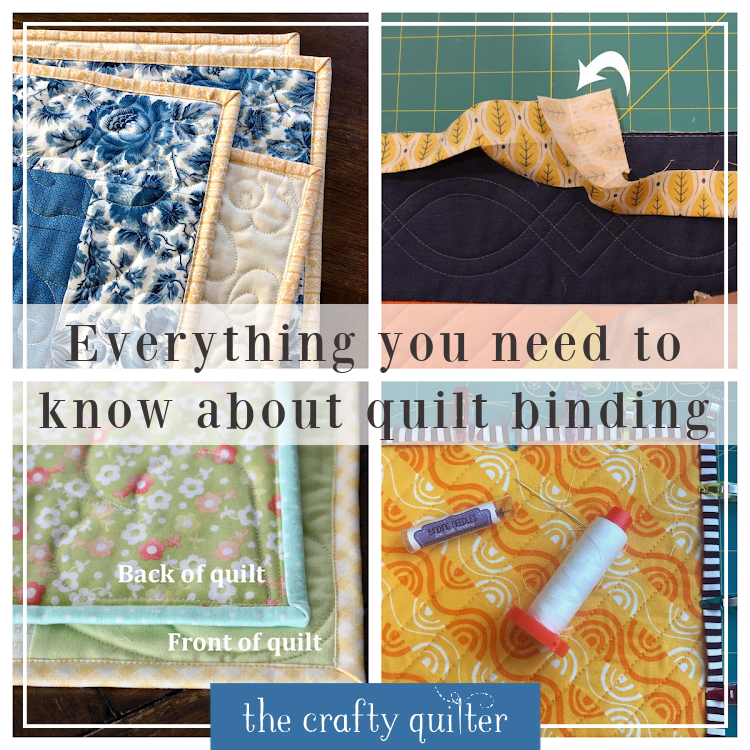
Everything you need to know about quilt binding in one place!
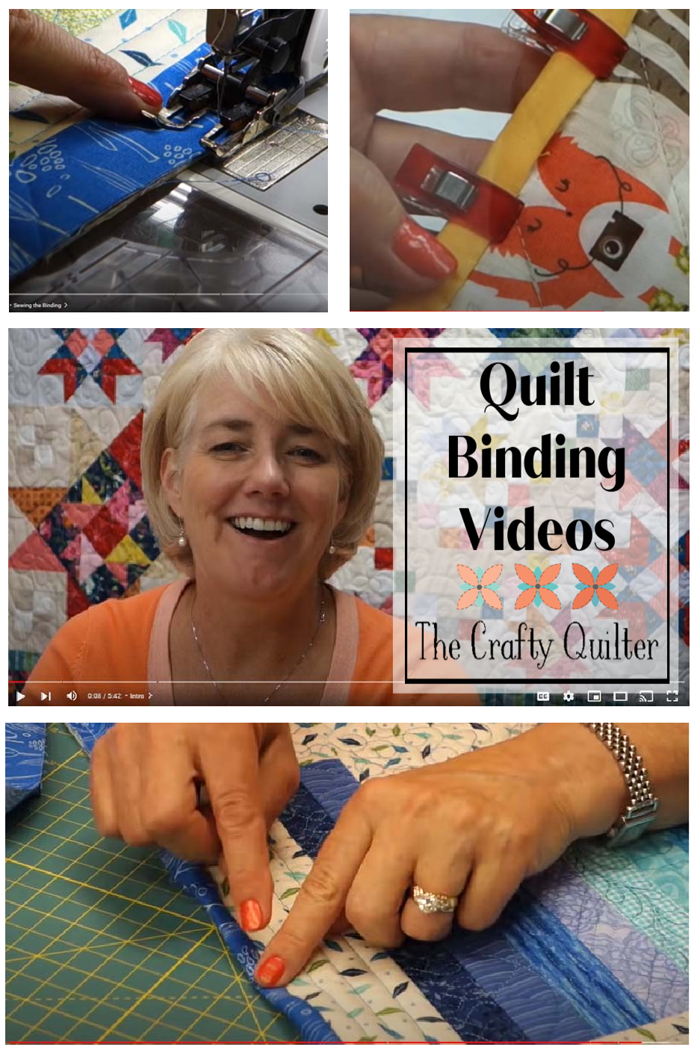
Quilt Binding Videos
It’s been eight years since these videos were recorded for The Quilt Show. I’ve had many people comment that they look to these videos when they need a refresher or a tip on completing their quilt binding. There are four videos all together, and they have a progression to them. The following contains a quick review of each, what you’ll learn and the video.
Video #1
The first quilt binding video is all about preparation.
- How to prepare your quilt sandwich before binding is added.
- How to prepare your binding strips and sew them together.
- Where to start the binding and how to avoid a binding seam landing in the corner.
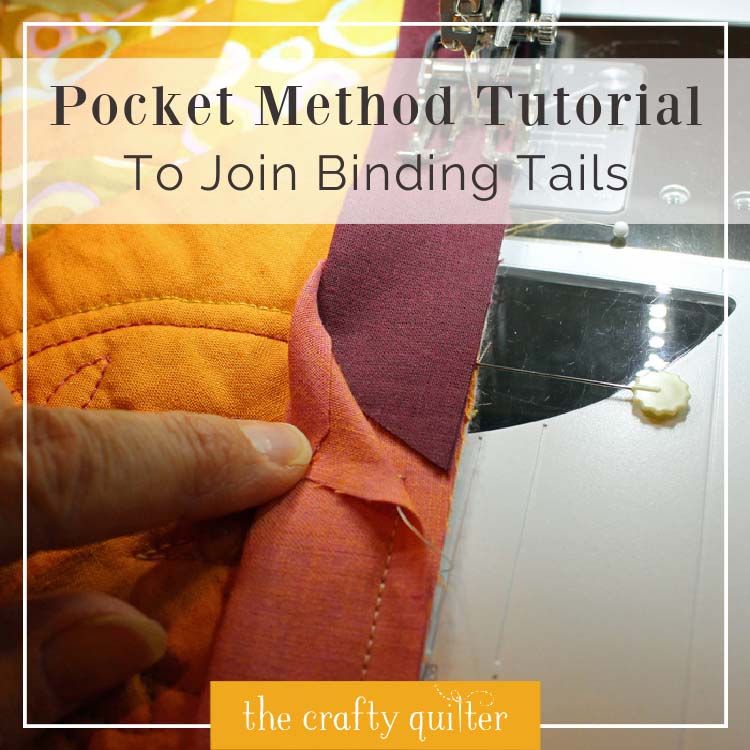
- Explanation of the pocket method of joining binding tails.
- How to create an exact stopping or pivot point at each corner.
Video #2
In this video, I give you all of the basic steps for adding binding to a quilt sandwich.
- How to stitch the binding using a walking foot and seam allowance check.
- How to determine where to stop before each corner and how to miter the corners.
- How to join binding tails with a diagonal seam.
Video #3
Once the quilt binding is sewn onto the quilt, it needs to be stitched down on the other side. This video shows one way of doing that by machine.
- First, press the binding away from the quilt top.
- Glue baste the binding to the backside.
- Stitch by machine from the front (in the ditch).
Video #4
In this last video, I show how to stitch the binding in place by hand. This is a traditional method and gives the quilt a nice finish on both sides.
- My favorite tools for hand stitched binding. One new item that I’ve since discovered are the Binding Needles by Primitive Gatherings. They are the bomb!
- How to make a quilter’s knot.
- How and where to start stitching.
- How to make a blind hem stitch.
- How to end your stitch.
More quilt binding info
Just like there are many ways to achieve the perfect seam allowance, you’ll find there are multiple ways to add binding to a quilt. There are some that will work better for you than others. I’ve since discovered a few more methods that I like and I’ve written separate tutorials for each.
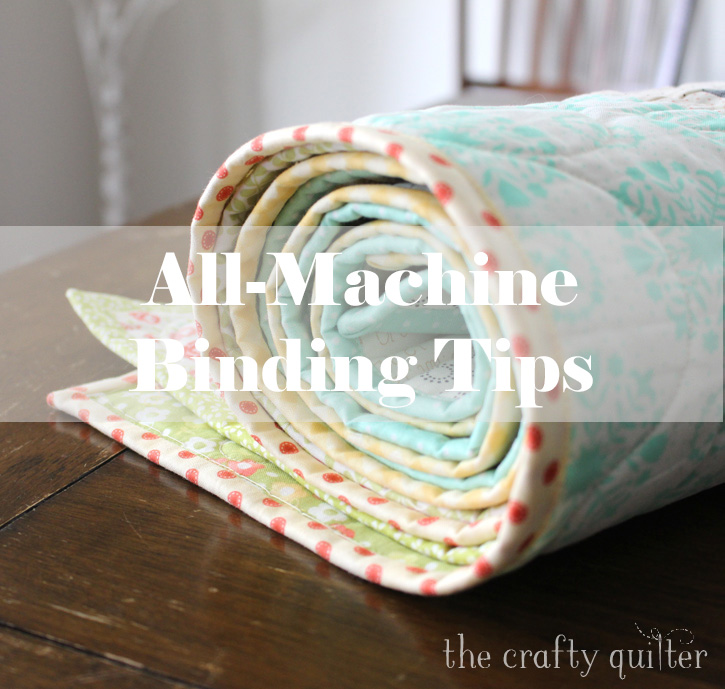
All Machine Binding
I often attach binding completely by machine and I’ve updated my method for that. Now I prefer to attach the binding to the back of the quilt and wrap it to the front. Then I machine stitch the binding on the front side close to the folded edge. My process for doing this and some tips can be found here.
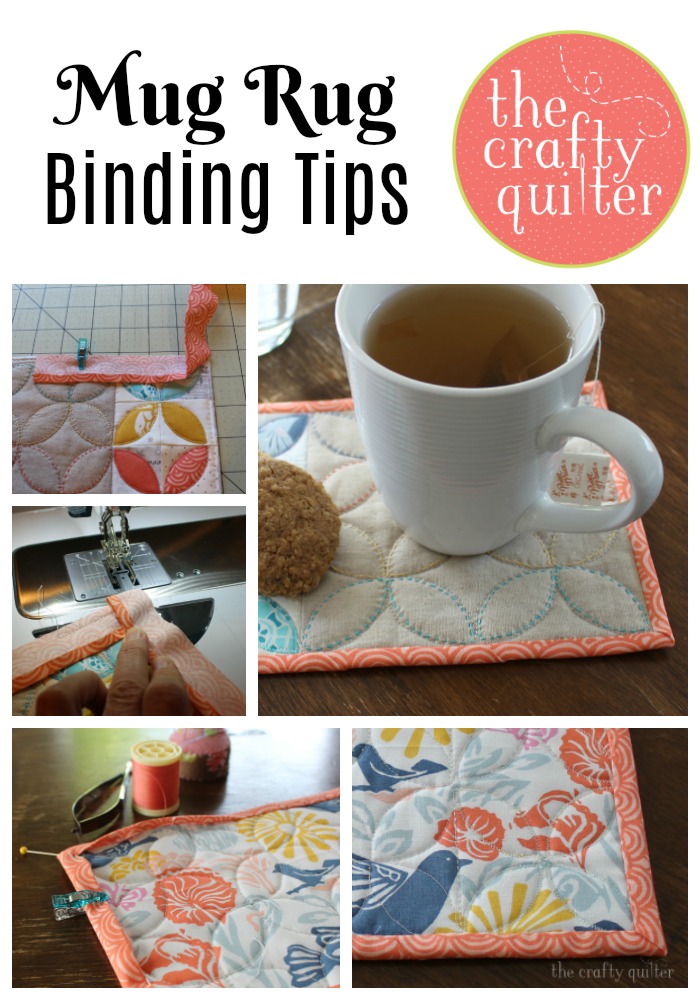
Binding for mug rugs and other small projects
Sometimes I like to use a single fold binding for mug rugs and the like. It reduces the bulk at the edges and fits the petite nature of these quilts. You can find all of my tips for that here.
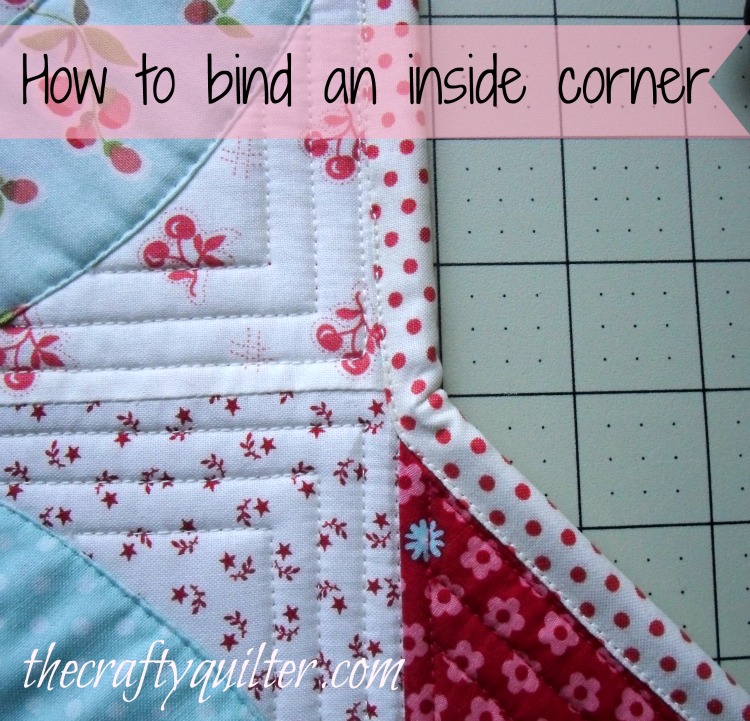
How to bind an inside corner
Not all quilts are square or rectangle. If you’ve ever made a quilt with an inside corner, I’ve got you covered. All of the details can be found here.
The Pocket Method of joining binding tails
When I first started quilting, I joined the binding tails with a “pocket” because other methods were too confusing. If this sounds like you, I have a great tutorial on how to use the Pocket Method for joining binding tails here.
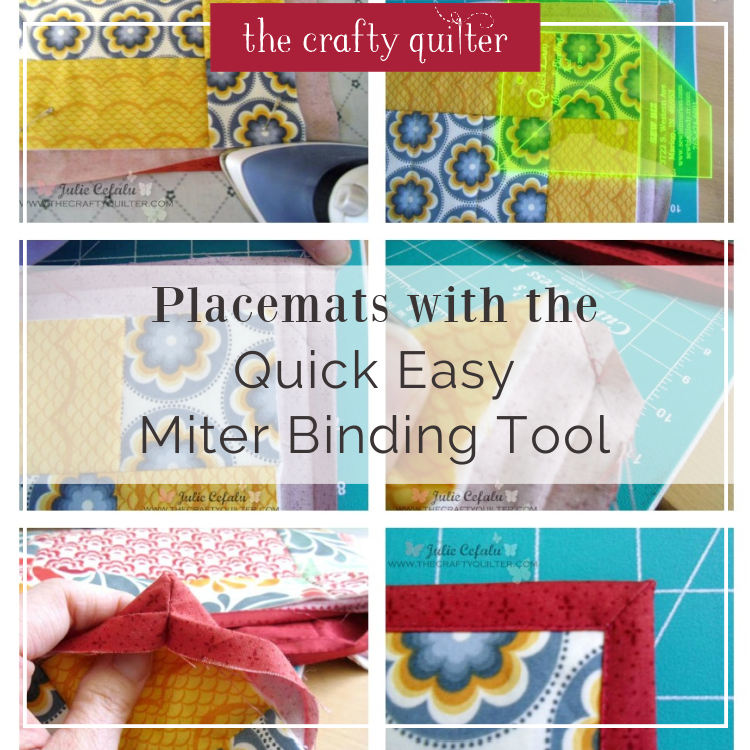
Fat quarter placemats using the Quick Easy Miter Binding Tool
I love any quilting project that is quick and easy. Years ago, I made a tutorial for fat quarter placemats and I used the Quick Easy Mitered Binding Tool. This tool is designed to use the quilt backing as the binding by wrapping it to the front and mitering the corners. It’s an awesome technique and you can find the details here along with the fat quarter placemat tutorial.
Future Binding Tutorials
Believe it or not, there are more quilting binding techniques that aren’t covered here. I’ll be making future tutorials for creating a flanged binding, using decorative binding stitches and big stitch hand binding. If you have any other ideas, let me know! I’ll update this post as they are completed.
I hope you found some information and ideas that are helpful. Quilt binding takes practice, but it’s worth the effort to find a technique that you can work with. Today, I look forward to this process and creating a lovely finish to all of my quilt projects no matter what size or shape.


Discover more from The Crafty Quilter
Subscribe to get the latest posts sent to your email.

A treasure trove of valuable information. Thanks!
I have been using your number 2 video for years! It finally helped my brain make sense as to how to sew mitered seam when finishing a binding! I have it booked marked and refer to it often! I have been using the flanged binding method for awhile now. I decided why hand stitch a quilt that I’m giving to charity when they probably wouldn’t appreciate it. I also started doing on my own quilts that I’m keeping. I do cut the strips 1/4” smaller than the directions I have because the binding fits much better, especially if the quilt is thin.
What a great informative newsletter to send out!
I love all that you teach and have always referred to your binding video where the two pieces meet for the first time ❤️ thank you for this
Would you do a section on using piping to finish a quilt? It makes a lovely, crisp edge and a strong one if the piping fabric is cut on the bias. I’d love to hear your thoughts on this. Thanks!
Thank you Julie
These tutorials helped me get started on a path to quilting whether a mini I can manage myself or the binding finish after picking up from a long arm service that last step to completion makes the quilt I appreciate having these to revisit and refresh the steps correctly
Do you have a video using the binding tool? I have it and for the life of me, I just can’t get a hand on using this “easy” tool, . Thank you.
I would love a tutorial about making & applying biased binding to quilts with scallops. I have a finished & quilted double wedding ring quilt that needs binding applied to finish it. I’m not comfortable with doing it. The videos I’ve watched on You Tube leave a lot of information out of them. Please consider this in your future. Thanks
Oh, thank goodness for putting these all in one place. I use Video #2 every time I finish a binding and have recommended it to others. Thanks for letting us know the instructions will be available and in one spot.
Super informative, Julie! I look forward to the flange technique! 🙂
Thank you Julie, very informative. A great post to keep on hand to refer to.
Thank you Julie!
What a wonderful overview of binding techniques, Julie! Very helpful and I will save it for future projects.
Linda Oliver