Mug Rug binding tips
After sharing my Orange Peel Mug Rug last month, I promised you some mug rug binding tips. Here they are – better late than never! I tried something a little different for this project and I’m pretty happy with the results. I think you will be too.
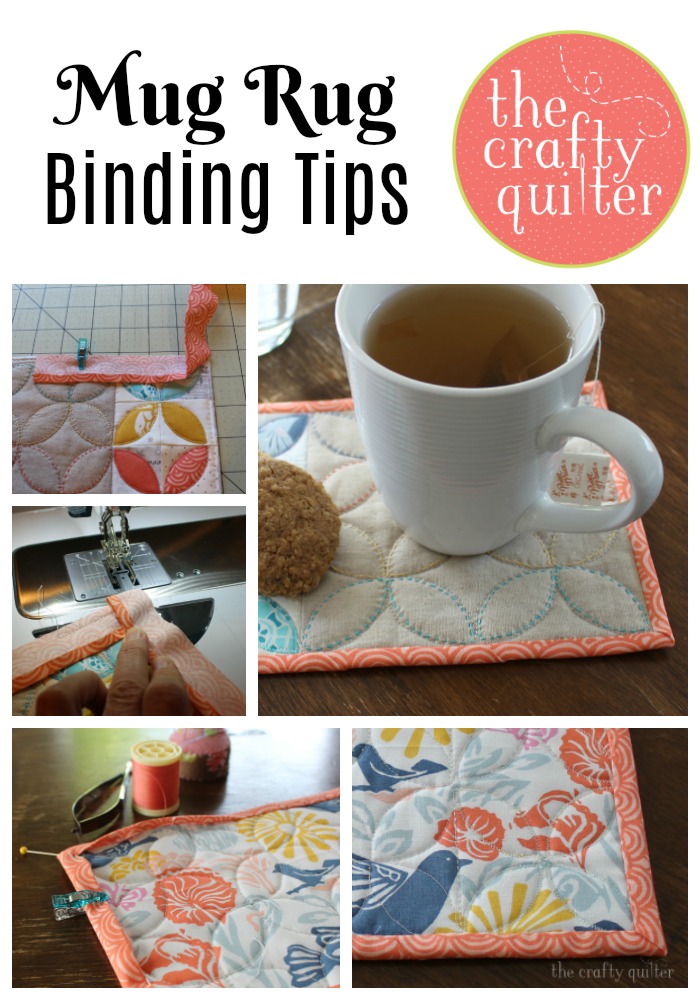
Mug Rug Binding Tips
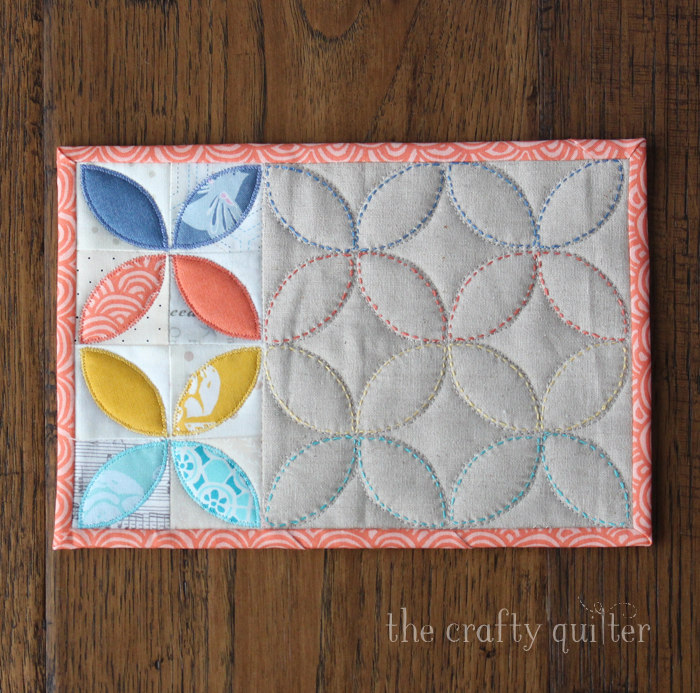
Mug rugs are such delicate little things. In the past, I’ve used traditional binding techniques with 2 1/4″ wide binding strips. This time I tried a single-fold binding, and I think it “fits” the petite nature of these mini quilts.
Tip: Single-fold binding reduces bulk in the corners and it lies a little flatter overall.
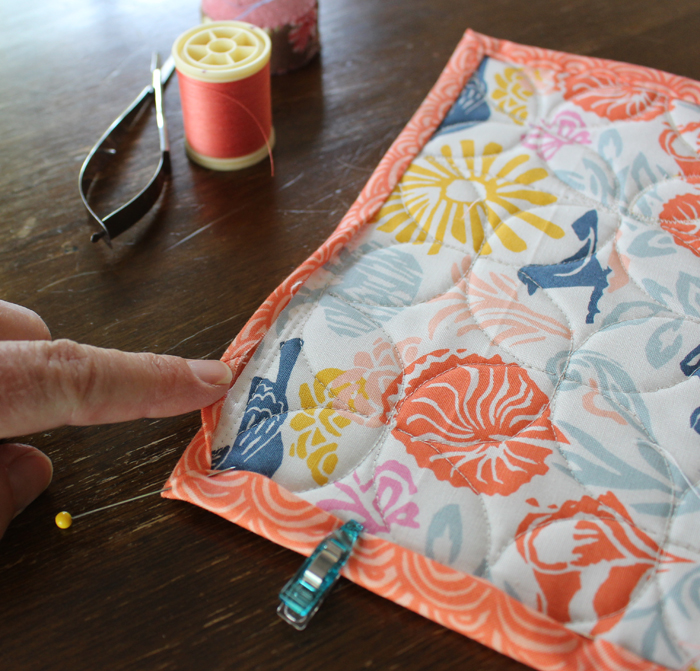
Start with a 1 1/4″ wide strip of fabric (I needed 2 strips since they were cut from a fat quarter). I’m using straight-of-grain strips, not bias strips. Press 1/4″ under one long edge of the strip. Treat it the same as you would any binding. For this project, I decided to sew the binding onto the front of the mug rug and then hand-stitch it down to the back.
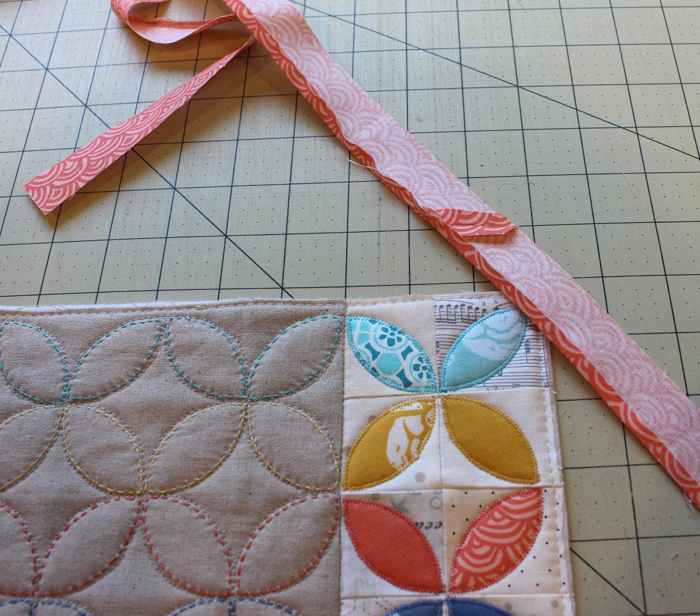
Tip: I like to baste the raw edges of my quilt (mug rug) by machine before adding the binding.
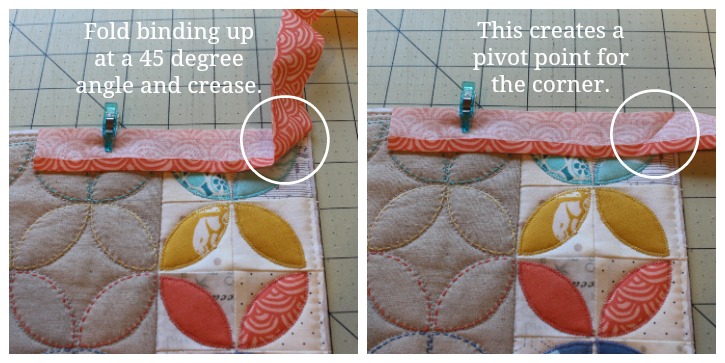
Start on one long side of the mug rug. To determine where to stop or pivot (I like to pivot and stitch out to the corner instead of backstitching), fold the binding strip up at a 45° angle at the corner and finger press it. Now you have a crease that shows you where to pivot.
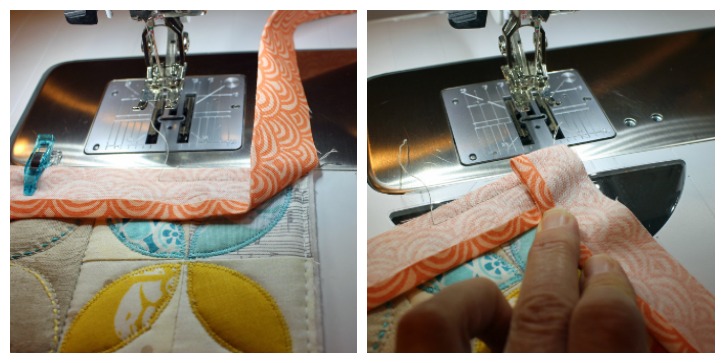
Use a 1/4″ seam allowance for sewing on the binding. This will give you plenty of room to cover the stitches when it is wrapped to the back of the mug rug. Because this is a single-fold binding, I used a 1/4″ foot (with built-in dual feed engaged). Normally I use a walking foot with double-fold binding because there are so many layers, and I want to avoid making tucks when I sew on the binding. Either way will work for this.
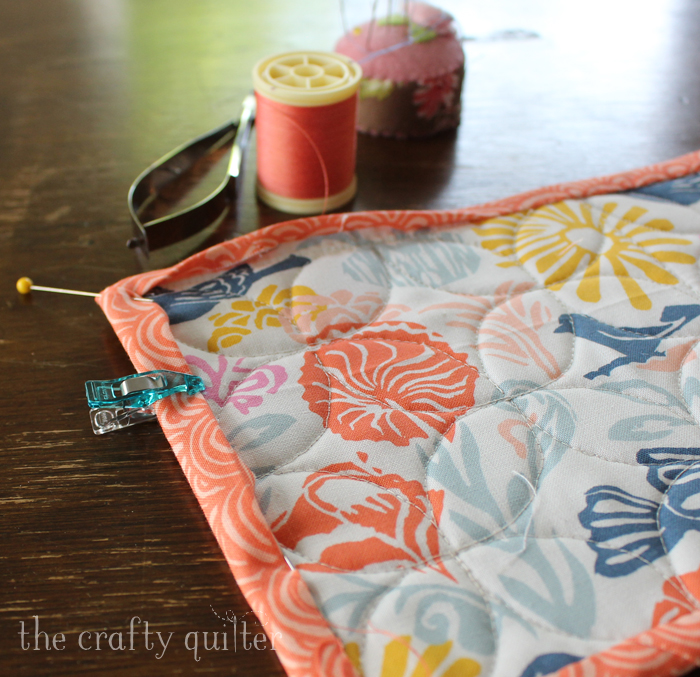
You can see how I pivot at the corner in the photo below (right).

The corners are folded the same way as traditional binding: up and away at a 45° angle, then folded down over itself. The top fold should be even with the previous edge and the raw edge of the binding should be even with the raw edge of the mug rug. Start stitching at the folded edge and continue to the next corner.
I didn’t take photos of how I joined the binding tails. I have a video on how to join them with a seam and a tutorial on joining them with the pocket method. For this project, I joined them with a seam and I made a mistake in my calculations, so I have two seams instead of one. Thus, no photos to show you how to do it right!
Next, wrap the binding to the back of the mug rug and pin or clip it in place (love those Mini Wonder Clips). The folded edge should cover your stitches easily. Miter the corners as usual. I used a blind hem stitch along the folded edge. You can see my video for that technique here. Personally, I enjoy a little hand-stitching, especially on a small project like this one.
I like how the binding turned out – not too bulky and just as easy as any other technique. I think this will be my new “go to” method for mug rugs.

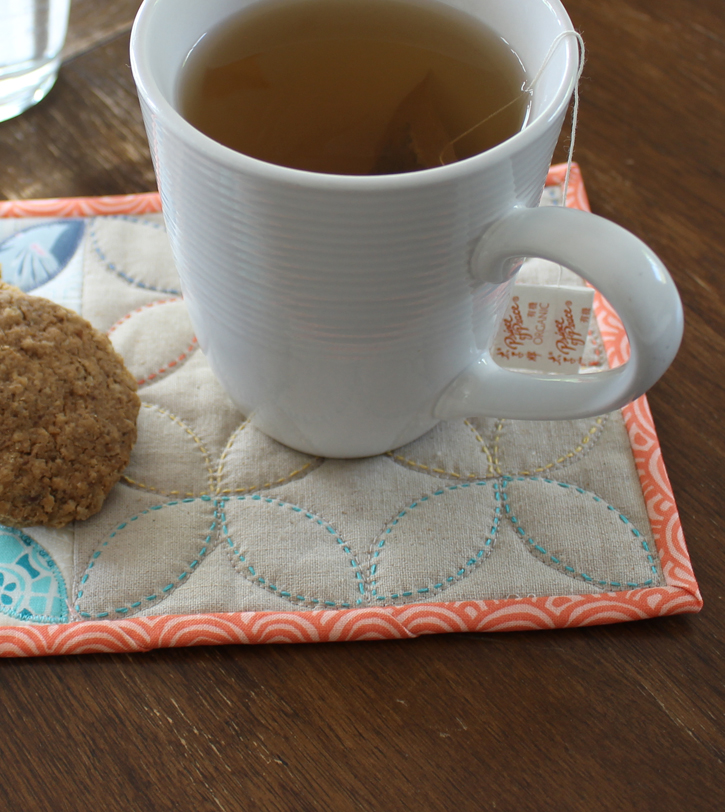
In case you missed it, you can find the original tutorial for the mug rug here: Orange Peel Mug Rug.
When you make your next mini quilt or mug rug, I hope you give this technique a try and let me know what you think. Happy Quilting!


Hi Julie…thank you so much for this…working on a mug rug for a gift and wondered what size to make the binding. When I saw your name pop up on google I knew you could help me!!! You’re the best and love everything you do!! L
Such a great idea! The edges wouldn’t be getting the wear a quilt does so a double layer isn’t necessary. Very nice! Thank you!
Thanks for the single fold binding tip for mug rugs. I used it today and it’s so much better than the double I was using. The corners were so much easier and better looking! Rosanne
Great tutorial on the binding, I have used the single fold binding for small quilts and found it works well. I love the design of the mug rug with the combo of the applique and the hand stitched orange peels.
this could not have come at a better time as I have promised to make some mug rugs for a charity stall and will use this method as you say not so bulky. I love the tip about folding the edge at the corner before you pivot mine until now has been guess work.
Thank you for the great tutorial on the binding. The double fold binding always seems too bulky for mini mug rugs. I like the idea of the single fold binding much better.
thank you Julie for this tutorial and all your great tutorials. It must take so much of your time putting them all together but they are so informative and clear. I am going to make this for my 90 yr old British friend who has tea every afternoon. Julie, what is the fabric you used for the petals? My friend loves these colors. Love the way you added shashiko to the project. Also, could you tell me the Aurifil # of the embroidery thread you used. Thank you and hope you are still enjoying your new home makeover.
Thanks Julie for the great tutorial. I hope to make some mug rugs and plan to try your method.
Thanks for the great tutorial. I have good intentions (as usual) of making some mug rugs before the year is over and will try the single fold binding. Makes great sense!
Love this technique! Will use this next time I make one, plus it may be a good way to bind mini wallhangings.
TFS
Thanks for the single binding tutorial ! Great Information!
No wonder yours always come out looking so good! Thanks, Julie!
Thank you for doing this tutorial on single fold binding. I have always done the double fold binding but as you said, single fold makes more sense on the small mug rugs. I, too, like hand stitching but I have done the machine stitching with the binding that leaves a small flange next to the binding on the right side. I really like the effect of that also. Have you tried it?
I love your Orange Peel Mug Rug! The sashiko stitching is gorgeous and quite “up my alley” 🙂 as I love hand stitching. Thank you for the binding tutorial. I am about to embark on a set of mug rugs for some friends. I think the single fold will be much easier for a little project. 🙂 Your tutorials are always very helpful with appropriate detail and very easy to follow. Thank you.
I would also like to say that on small projects like this I usually cut the backing a bit larger and trim to fold over the edges and hand stitch.
Hi, Julie…..I like this and will try. I think the traditional way of folding the binding strip in half and stitching around is because the edges get the most wear. Thank you for your instructions.
Good point, Sandy! I like the extra support on most of my regular-sized quilt projects.