Orange Peel Quilt SAL Week 6
Ready or not, it’s the final week of the Orange Peel Quilt Sew Along! Some of you may be at the point where you’ve finished the applique portion and you’re ready to finish this quilt! If not, you can always refer to this week’s material at a later time.
Today, I’m going to share a few ideas for quilting and give you some links for my favorite ways to attach binding (and don’t forget the quilt label). Let’s get to it!
If you’re new to this sew along, you can still join in at your own pace. It’s free! You can sign up (below) to receive the weekly emails. It’s the best way to receive the lessons, pdf’s and videos without the distraction of display ads. You can read more about the Orange Peel SAL here.
Quilting the quilt
Do you ever just stare at a quilt top and wonder how on earth you’re going to quilt it? Beyond the design decisions, there are a few other considerations such as time expenditure, skill level, and the type of quilt you’re making. For me, the biggest factor is how much time do I want to invest in the quilting?
I know for many of you, the quilting design is the hardest part. No worries, because I’m here to give you ideas for quilting an Orange Peel Quilt!
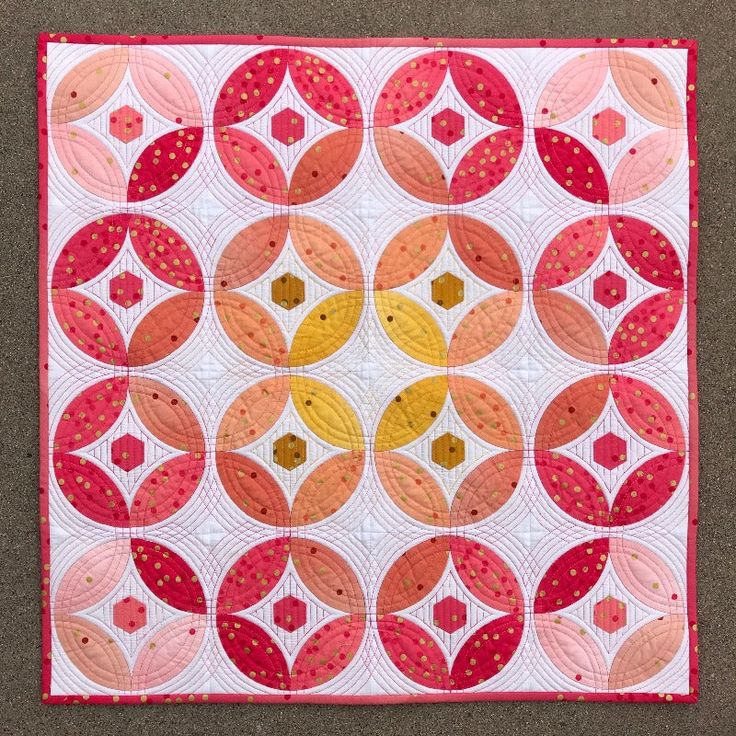
My Quilting Details
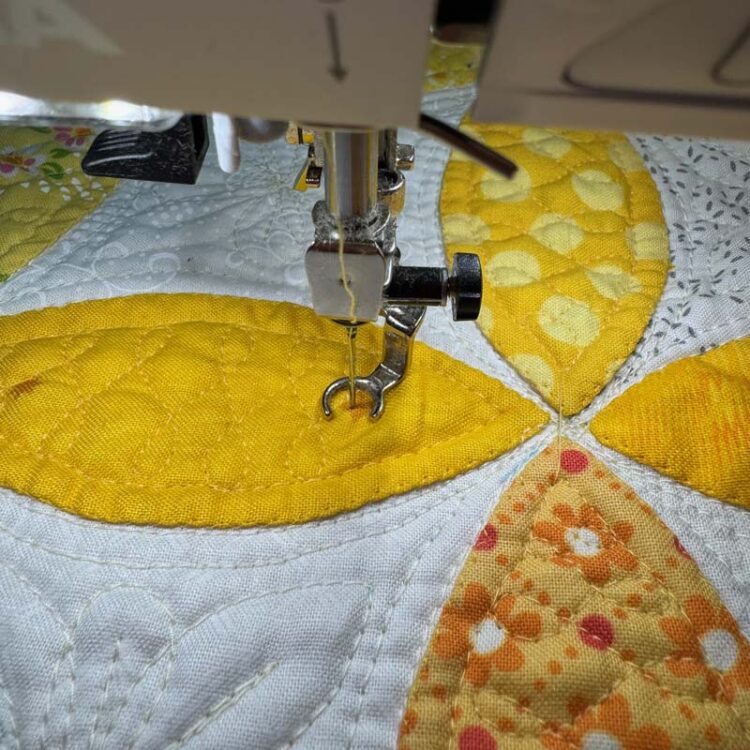
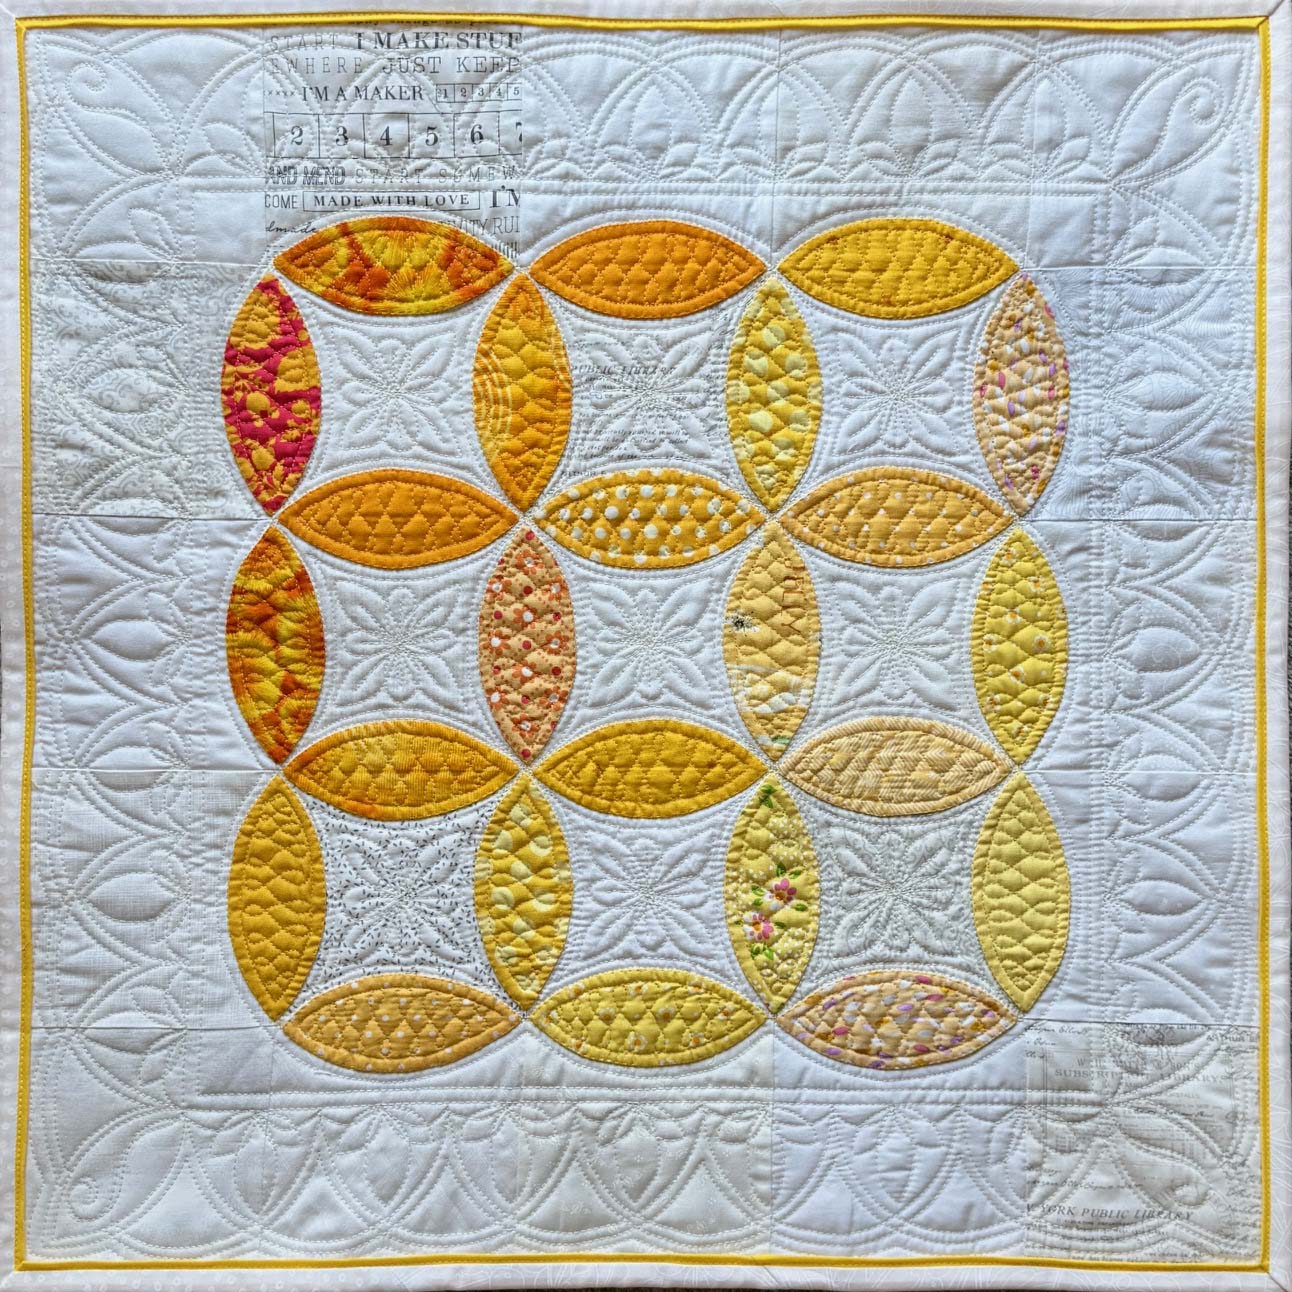
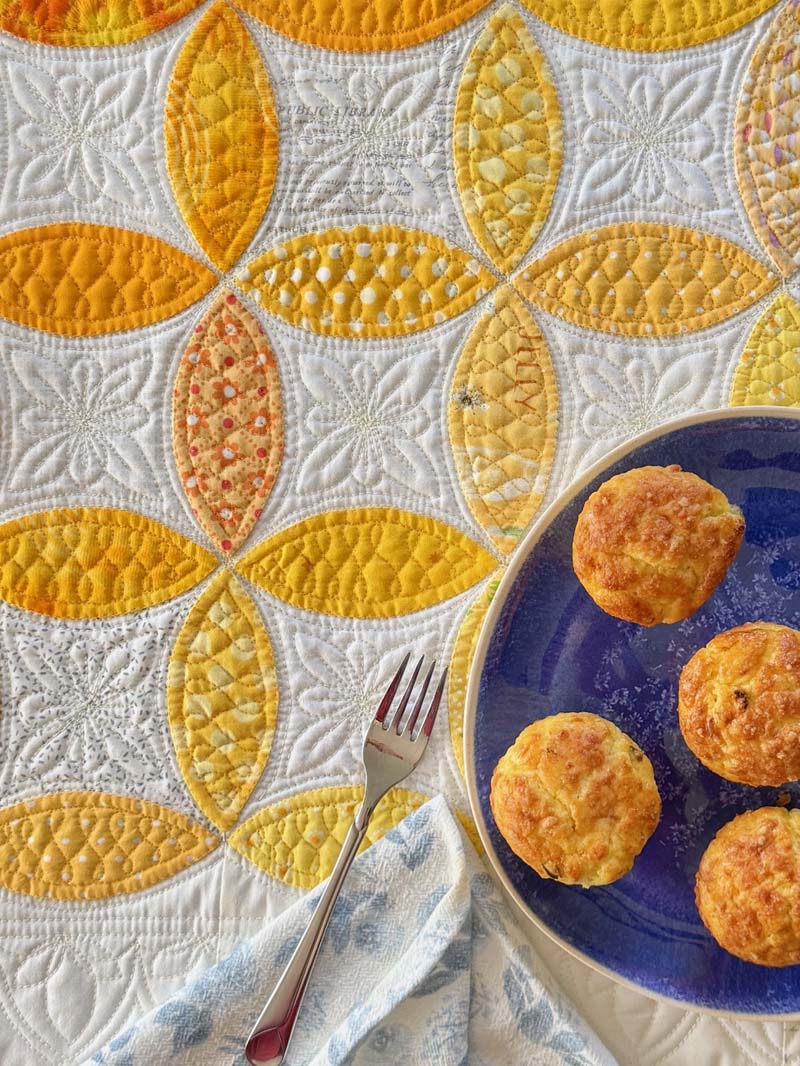
You’ve already seen my finished Mini Orange Peel Quilt, but now I’ll share the quilting in more detail.
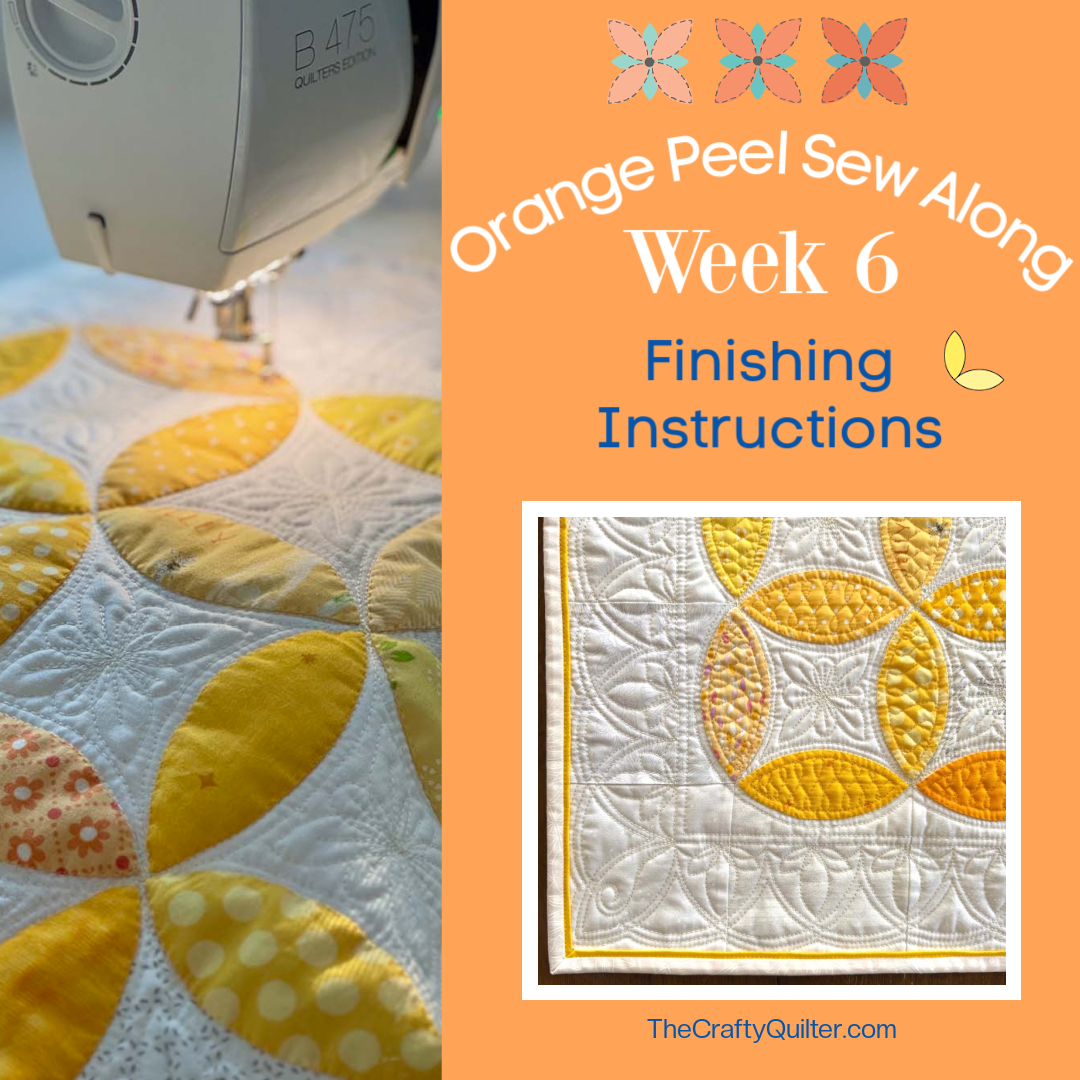
I did most of the quilting with free motion. There is a little bit of straight line quilting with a walking foot. I find it very difficult to stitch straight lines when I free motion quilt. I also stitched the border arches with a walking foot since the curve was gentle enough.
Below, is an image of the back of my quilt. It’s sometimes less distracting to see the quilting from the backside.
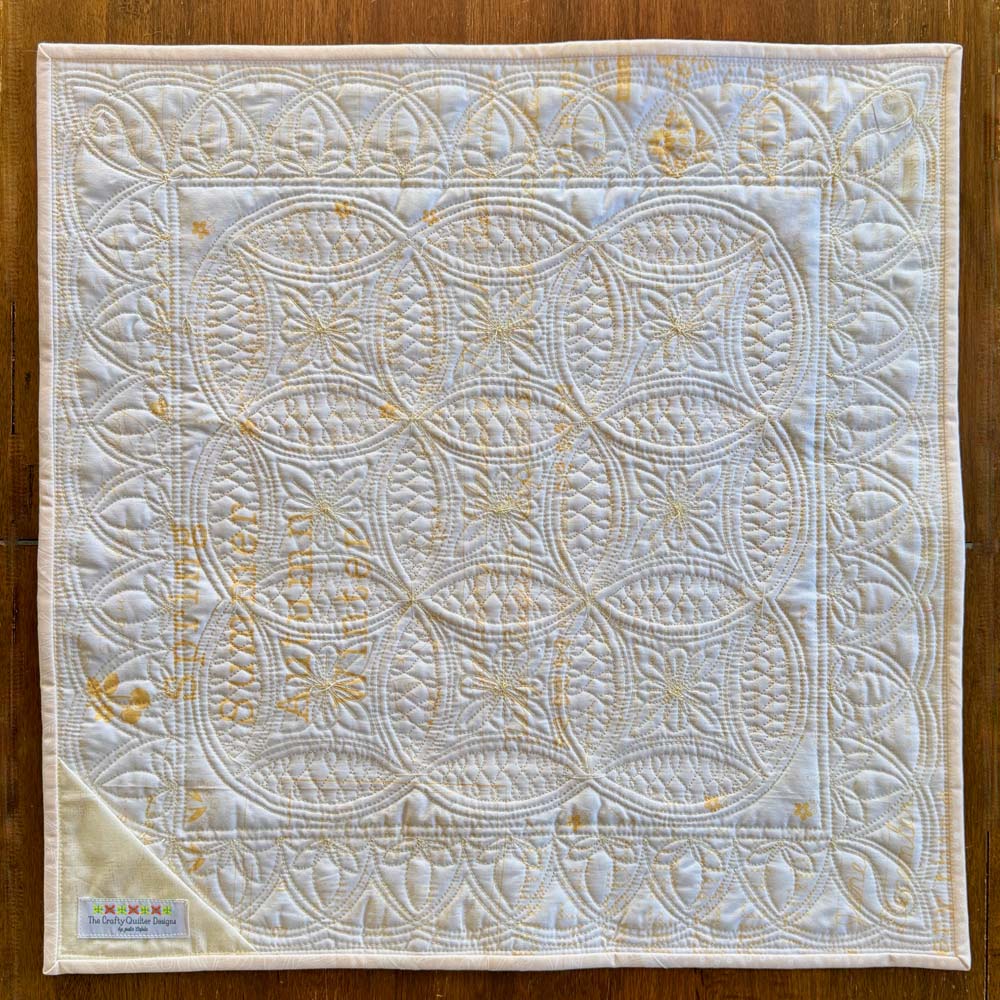
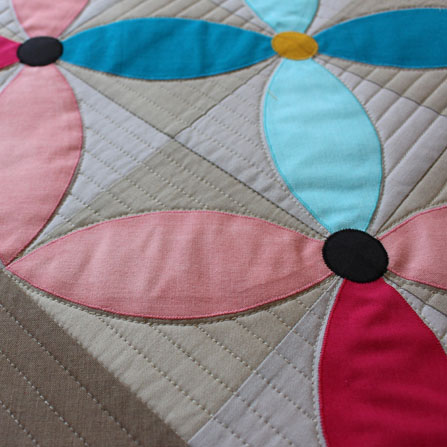
Anytime I have applique in a quilt, I like to quilt around the outside of the shape – about 1/8″ away. It gives the applique more definition. I often add an outline stitch ¼” inside the shape as well. This really sets the stage for any quilting I add to the middle of the orange peel. I used a wishbone design for the quilting there.
The space between the orange peels was echo quilted ¼” away and then a center flower/leaf design was stitched in that area.
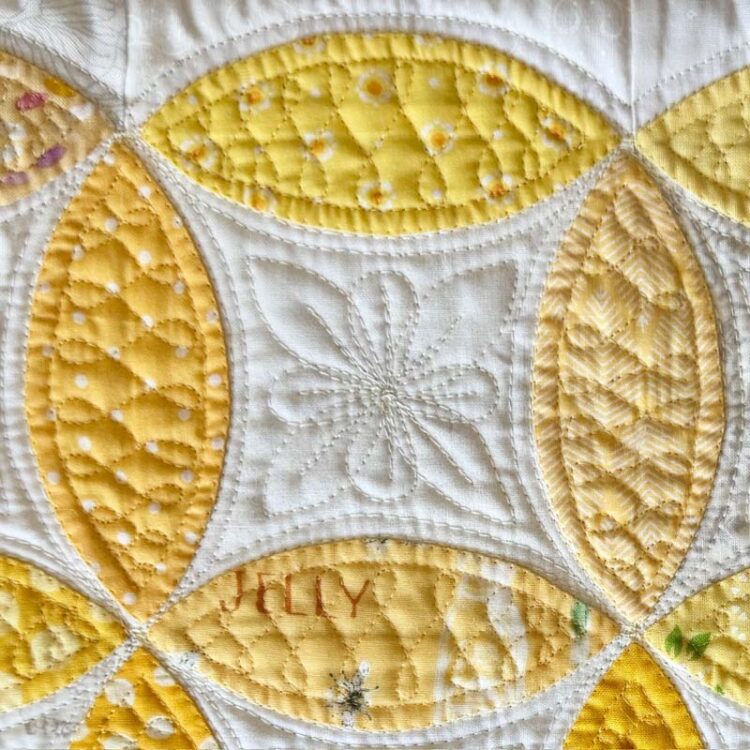
I was at a loss when it came to the outside border area of the quilt. When this happens, I often turn to stencils for guidance. I found one that fit that area almost perfectly. I didn’t take any photos while I was using the stencil, but you can see it in the image (below left). You can read my full blog post on how to use stencils for quilting here.
I added more quilting inside the arches of the stencil design because I felt it needed more quilting. If the center of a quilt is heavily quilted, the borders need a similar amount of quilting or they won’t lay flat.


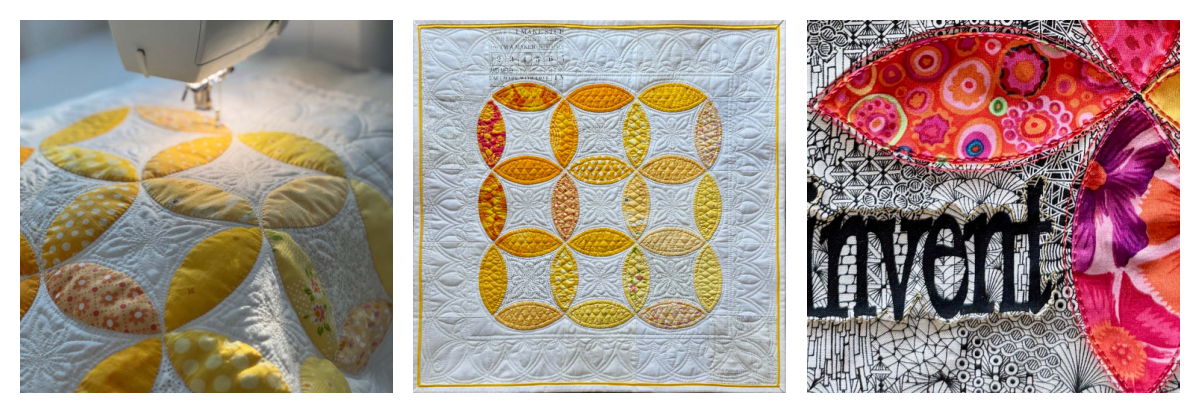
Quilting Inspiration
True confession; I’m not good at coming up with my own designs for quilting. I often scour Instagram and Pinterest for inspiration. And that’s exactly what I’ve done for you.
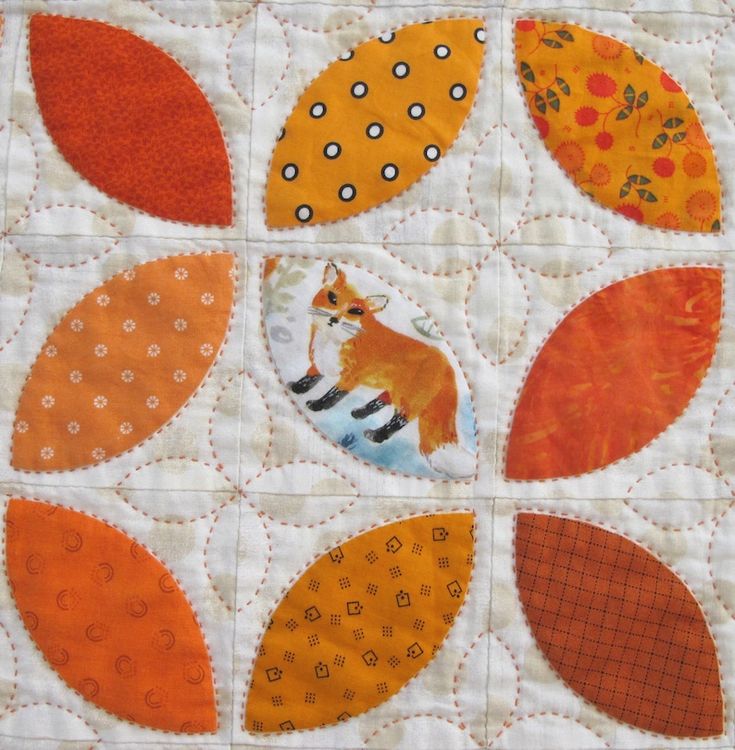
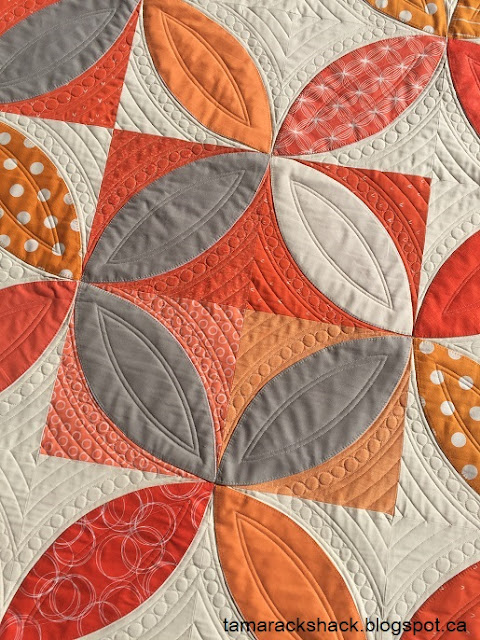
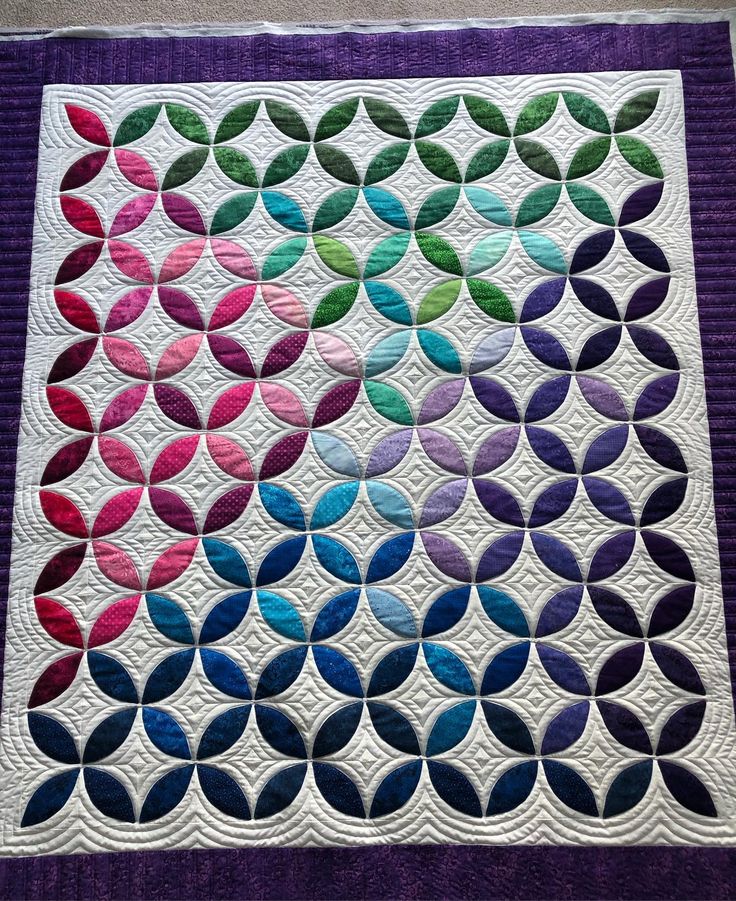
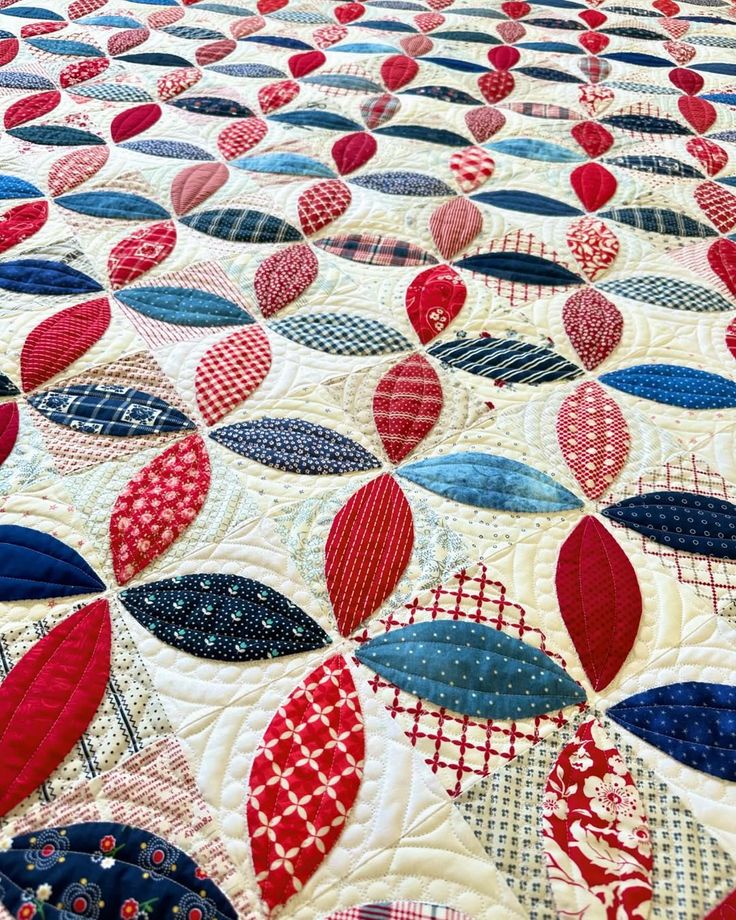
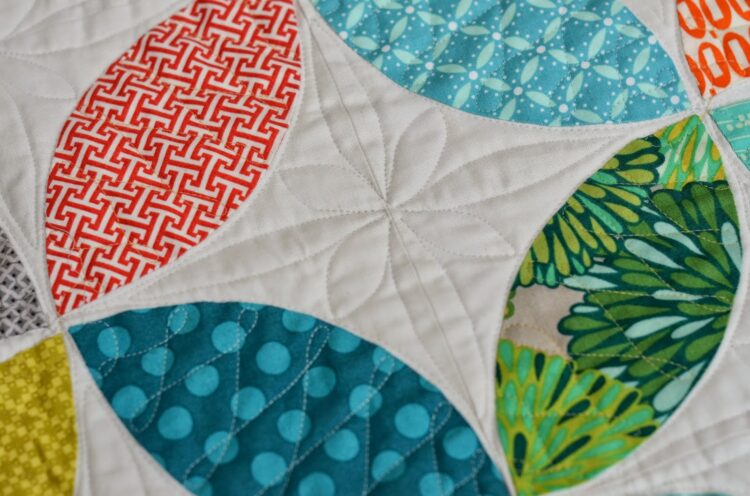
Below are photos that will serve as a springboard for quilting ideas. Some are simple and others are more complex. If you look closely, you’ll notice that a few are hand quilted (my dream). I invite you to experiment and perhaps take elements from a few and play with them together until you like what you see.
If you click on an image, it will take you to the original source when available.
NOTE: If you’re reading this in an email, you may not see any images. You’ll have to read it in a browser. Just click the title at the top of the email and it will open up the blog post.
 Unidentified (from Pinterest)


Auditioning quilt designs
I find it so helpful when I can audition quilt designs before I commit. Thankfully, there are several ways to do this! I have a full blog post on how to audition quilt designs here.
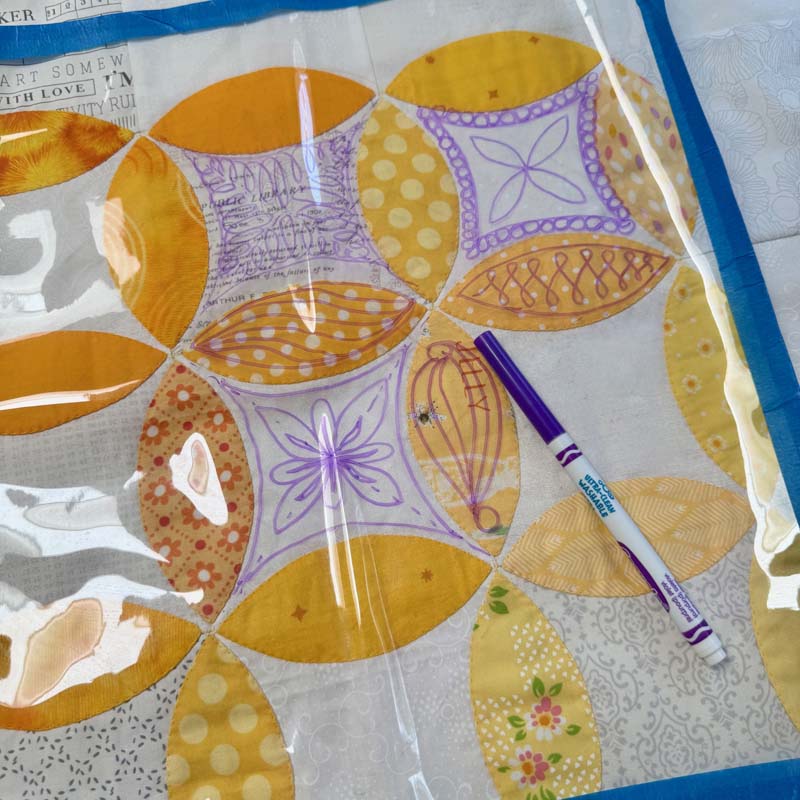
One of my favorite ways is to use clear vinyl and a wet erase marker such as Crayola Ultra Clean Washable Markers. I placed blue painters tape around the edges of the vinyl so I could see the boundaries clearly. (You don’t want to accidentally mark the fabric). Once everything is in place, just start doodling!
Another tool for testing out designs is a digital illustration App called ProCreate. I imported an image onto my Apple iPad Pro and used ProCreate to draw quilting designs onto the orange peel quilt with an Apple Pencil. I’m not great at the smooth drawing strokes, but it’s a quick way to play with ideas.


Binding

One of the last things to do in quilt-making is add binding to your quilt. I find that people either love binding or hate binding, and there doesn’t seem to be a middle ground. Fortunately, I love binding!
I’ve been using flanged binding a lot lately. It adds a nice accent to the binding edge and it’s easy to do. It’s what I used on my small Orange Peel Quilt. I have a full tutorial on how to make flanged quilt binding here, and you can download my instructions (with images) below!
If you’re interested in other binding techniques, visit My Videos and More About Quilt Binding. There you’ll find links to all-machine binding, pocket-method of joining binding tails, tips for binding mug rugs and more.
Quilt Label
Do you add labels to your quilts? It’s the very last thing to do and often overlooked. I don’t know about you, but I’m usually ready to move onto the next project so I forgo that task. One thing is for sure, you’ll never regret adding a label to a quilt!
Here’s an easy way to make a quilt label:
- Cut a 6″ square of fabric.
- Fold it in half diagonally, wrong sides together, creating a triangle.
- With a permanent marker, add details on one side of the triangle keeping in mind the seam allowance along the raw edges.
- Before adding binding, place the triangle label in the corner of the back of the quilt.
- When you add the binding, it will encase the raw edges of the label.
- You can hand-stitch the folded edge down or leave it open.

Another idea that would work especially well with this quilt is to make one orange peel with the faced technique and use it as your label. It might be a bit small, but you can add the date and your name at the very least.
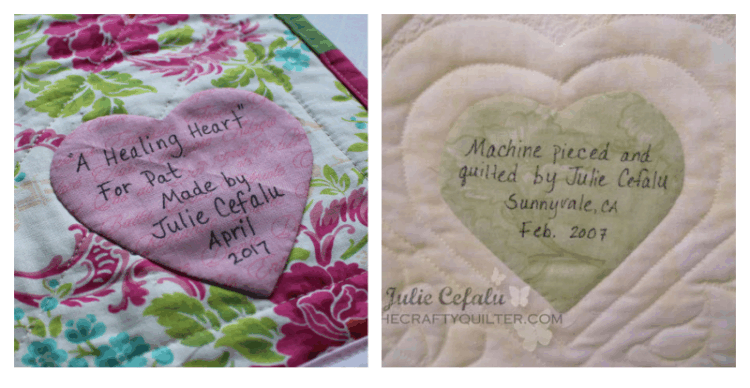
Below are two quilt labels I made in a similar way with a heart shape. So cute!
I often get asked where to get custom quilt labels made. I’ve used The Dutch Label Shop (see mine below) and Ever Emblem. They’re both great companies, but I’d say Ever Emblem caters more to the hobbyist, and The Dutch Label Shop is good if you want to add a company logo. Either way, it’s so nice to have a personalized label!

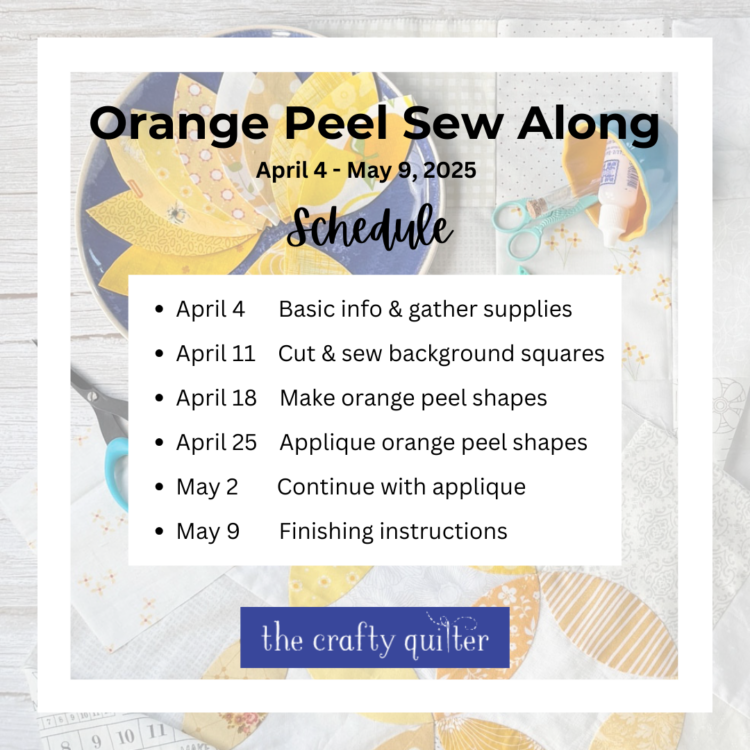
Sew Along Schedule
Orange peel pattern
The orange peel pattern is a pdf that you can download and print. It includes basic instructions along with the template page. Please note this is a free pattern and has not been tech edited.
This week’s assignment
- Baste and quilt the sandwich
- Attach binding
- Add a label
- Take a picture!
Previous week’s lessons
- Orange Peel SAL Introduction
- Orange Peel SAL Week 1
- Orange Peel SAL Week 2
- Orange Peel SAL Week 3
- Orange Peel SAL Week 4
- Orange Peel SAL Week 5
Sharing
I’ve been seeing some beautiful Orange Peel Quilts on Instagram! Make sure to use the hashtag #orangepeelsewalong and tag me @thecraftyquilter. Remember that only public accounts are visible to everyone (even with the hashtag).
I hope you’ve enjoyed the Orange Peel Sew Along. Hopefully you’ve learned a new technique and you made a lovely orange peel quilt in the process. Make sure to take a picture of your quilt! You can add it to the link-up next week and be eligible for a giveaway.

Discover more from The Crafty Quilter
Subscribe to get the latest posts sent to your email.

I have thoroughly enjoyed following along, the orange peel tutorial. I tried both the freezer paper/starch method and using fusible interfacing, hand stitching both.
I can appreciate all your efforts. All the instructions were very detailed.
My hope is that you will be doing additional tutorials.
Thank you.
Bev